SLIDER

beatrix bakes
Showing posts with label beatrix bakes. Show all posts

cocoa meringue roulade

8 Jun 2026


I made a roulade to celebrate my friend's birthday but rather than my tried and true recipe, I used a different recipe because change is supposed to be a good thing. I turned to Natalie Paull's cocoa meringue roulade recipe because she's the goddess of baking. My usual recipe uses whole eggs whilst this roulade only uses egg whites, so really its a rolled pavlova by another name.


The roulade has a crunchy texture unlike my usual roulade and I took it my friend’s place interested to see how it compared to my old faithful recipe.


Here's the recipe for you which makes an 8 x 12 inch roulade. For all my recipes I use a 250ml cup and a 20-ml tablespoon, unsalted butter and 60g eggs. My oven is a conventional gas oven so if your oven is fan forced you may need to reduce your oven temperature by 20C

Cocoa meringue roulade - serves 4-6
Ingredients
120g egg whites (about 4)
pinch cream of tartar
200g caster sugar
35g dutch cocoa, plus extra to dust
5g vanilla essence or paste
pinch salt

For the filling
300g pure cream 
5g vanilla bean paste
1 punnet of your favourite berries (I used a mix of raspberries and strawberries)

Method
Preheat oven to 150˚C, fan forced or 170˚C, conventional. Line a 8 x 12 inch flat tray with canola spray and baking paper.

Using a stand mixer, place the egg whites and cream of tartar in the bowl, attach the whisk and put the stand mixer onto a medium-high speed. Whisk the whites until they reach firm peaks but are not chunky - they should still look creamy. (note: you can also use electric beaters or whisk by hand).

Add half of the sugar gradually, a scant tablespoon at a time to start with, then two at a time as the mix gets glossy and firm. Add the vanilla.


Stir the cocoa, salt and remaining sugar together and add all at once to the meringue (turn the machine off, add the cocoa mix, and wrap a teatowel around the mixer before turning the machine on again as the cocoa can go everywhere). Mix for 10 seconds then complete the mixing process with a spatula. Don't overmix or the meringue will get 'soupy'.

Scrape the meringue mix out onto the prepared tray and smooth out with an offset spatula leaving a centimetre or so margin, as the meringue will puff and spread when baking. Once spread, the meringue should be approximately one centimetre high. If using a tin with higher sides spread it all the way to the edge.

Bake for 15 to 20 minutes, or until the top feels like a crunchy pillow. Cool the meringue completely (about 30 minutes). Check for residual warmth before adding the cream and assembling. The meringue can be prepared the day before filling.

Whip cream and vanilla to soft, supple peaks. Dust a sheet of clingwrap (slightly larger than the meringue) with cocoa powder. Flip the meringue onto the clingwrap, and carefully peel off the baking powder. Trim the sides of the meringue. The shorter side of the meringue should be facing you.


Spread the whipped cream over the meringue, leaving a 2.5 centimetre wide un-creamed strip along the top. 
Scatter the berries over the cream, making sure there is a good strip of berries along the bottom, because that will form the centre of the finished roulade.


Use the clingwrap to pull up the start of the roll, and tuck the meringue in along the length of the sheet, to get it started. Holding the clingwrap, roll it up using your fingers underneath to guide it. Use a repetitive lift and roll motion until you do a final full roll to reach the end of the meringue, with the seam underneath. To position the roulade onto a plate, roll the wrapped roulade so that the seam is at the top, flip it directly onto the plate, and unwrap the clingwrap. To serve, slice on a diagonal using a hot, serrated knife.


As I made this for a birthday, I don't have a cut slice to share with you but I can tell you that it was a big hit with the birthday girl and her twin daughters (who licked their plates clean!).

See you again next week with some more baking from my kitchen.

Bye for now,

Jillian

PRINT RECIPE

pillowy peach polenta tart

2 Mar 2026


I've had this pillowy peach polenta pie recipe bookmarked for quite some time.  The recipe (s) came from Natalie Paul's first cookbook, Beatrix Bakes, which I borrowed from the library then photocopied the recipe. Once peach season  arrived I fished out the recipe and discovered I didn't have the recipe for the custard filling. When I copied the recipe I hadn't realised there were 4 separate elements to the recipe and I'd only copied 3 of the 4 components. In the end I decided to use a different custard filling from Natalie's second book, Beatrix Bakes Another Slice, which I whipped up in the microwave.


Although I do own a 24cm round tart tin, I just love my rectangular tin. It's so easy to cut the finished tart into neat slices but it's smaller and I have to scale the recipe down to 2/3 of all the ingredients. If you'd like to make the 24cm round tart, you'll need to roast a kilo of peaches and prepare 50% more of the polenta pastry recipe. The amount of custard should be sufficient.


Here's the recipe for you, adapted from Natalie Paull's recipe for pillowy peach and polenta pie, which makes a 10 x 35cm oblong tart. For all my recipes, I use a 250 ml cup and a 20 ml tablespoon. All eggs are 60 grams and my oven is a conventional oven not fan forced, so you may need to reduce your oven temperature by 20°C. 


Pillowy peach and polenta tart - serves 7 
Citrus-roasted peaches
750g ripe peaches (approximately 6 peaches)
150g/ml orange juice (or juice from other mid-acidic citrus, such as mandarin or tangelo)
40g caster sugar

Polenta crust
160g plain flour
65g fine (or instant) yellow polenta
65g caster sugar
1/4 tsp fine sea salt
100g unsalted butter, cold and diced
1 egg yolk (25g)
15g/ml cream
½ tsp vanilla paste
2 tsp finely grated 
lemon zest

Vanilla pastry custard 
50g caster sugar
20g cornflour
pinch sea-salt flakes
40g cream
40g egg yolk (from 2 eggs)
200g/ml full-fat milk
1/2 tsp vanilla bean paste

To assemble
1 egg white, lightly beaten
icing sugar for dusting

Citrus-roasted peaches 
Preheat the oven to 160°C, fan forced/
180°C, conventional. Have ready a large non-reactive roasting tin that will hold the fruit, when halved, in a single layer.

Remove any stems and cut around the natural seam of the fruit. Twist the sides to release the halves from the stone - do this over the roasting tin to catch any juice. If the fruit shows resistance, switch to carving the lobes off with a small-serrated knife. Put the fruit in the tin.

Pour the orange juice over the fruit and scatter over the sugar. Place a piece of baking paper on top and press down lightly to meet the fruit. Cover tightly with foil. Bake for 30-40 minutes.

Peel the foil back and lift the paper carefully to avoid nasty steam burns. You are looking for the fruit to retain their shape, but for the flesh to feel yielding to the touch when squeezed lightly and for the raw appearance to diminish. If the fruit are just on the cusp of cooked when you take them from the oven, employ the resting technique; keep them covered with foil to retain the heat and leave them to rest to doneness.

Cool to warm, taking the foil off but leaving the paper on to prevent discolouration. If the skins slip off easily, peel away. If they are obstinate, leave the skins on, as removing the skin can tear the flesh away and that's too precious to lose. Store the fruit in their syrup in the fridge.


Polenta crust 
Put the flour, polenta, sugar and salt in a wide mixing bowl. Using your fingertips, rub the butter into the dry ingredients just until the butter lumps are the size of small peas and the flour has taken on a yellowy hue. When tossing through your fingers, it should feel like silky ground almonds with a little polenta grit interspersed with buttery lumps. These small butter lumps are going to melt during baking, creating a little steam, which will help flake the pastry apart.

Lightly combine the egg yolk, cream, vanilla and lemon zest in a small bowl, then add to the buttery flour. Keep mixing with your hands, lightly squeezing the dough together. The mix will look crumbly at first and then will come together like stiff play dough. Loosely wrap the dough in plastic wrap, then press the dough into a 2 cm thick disc, gently squeezing around the edge to smooth out any cracks. If the dough is not too warm, you can start rolling now. Or if it feels sticky, chill in the fridge for at least 15 minutes - just ensure that the dough is nicely pliable before rolling.

Divide the dough into two pieces: two-thirds and one-third (280g and 140g). The larger portion is for the base of the tart and the smaller portion is for the top. 
Place the dough between 2 sheets of baking paper and press it out a little with the palm of your hand to ease it into the start of rolling. Roll out the dough to into a rectangle about 4-mm thick. Trim, then gently lift and flop the dough into the tin.

Working in sections, tuck the dough right into the edge and against the side of the tart tin to prevent air pockets, then roll off the excess with a rolling pin.

Add the offcuts to the smaller dough portion wrap in plastic wrap and chill until needed. The pastry can be a little pesky to roll, so ensure it isn't too warm before you start. It will happily be lightly kneaded again for a second or third attempt at rolling.


Freeze the tart shell for at least 1 hour before blind baking. Make the custard while the tart shell is chilling.

Cold start vanilla custard

Place the sugar, cornflour and salt into a medium heatproof bowl. Mix in the cream and the egg yolks and stir until well combined. Stream in the milk and vanilla bean paste and mix until smooth.

Place the bowl into a microwave oven and cook on high for 2 minutes, stirring after each minute. Cook for another 30 seconds on high, stir and then microwave for another 30 seconds. As the custard thickens it will look lumpy but just whisk hard and it will all come together into a thick paste in 30 second to a minute. Return the bowl to the microwave and cook for another 30 seconds if not quite thick enough.

Once cooked, scrape the custard into a plastic container and press a piece of plastic wrap on the surface of the custard to prevent a rubbery skin forming. Chill for an hour. If, after chilling, the custard appears sloppy, it was undercooked. Simply return the custard to the microwave and cook for another 30 seconds to 1 minute or until thick.

Prebake the crust
Preheat the oven to 180°C (350°F), conventional. Cover the frozen dough with a piece of aluminium foil, tucking it snugly into the edge of the tin. Fill the lined tin with sugar or baking beads and bake for 20 minutes or until the crust has just set and there is a whisper of brown on the edges. The pie will be filled and re-baked, so the crust is only baked until pale. Cool for at least 15 minutes before filling.

Meanwhile, remove the remaining portion of dough from the fridge to soften for rolling. Get the citrus-roasted stone fruit ready. Pull the peaches out of the syrup (you will have some fruit and syrup left over, so freeze them for another baking adventure) and dry between paper towel. When the crust has cooled, smooth the vanilla pastry custard over the base using an offset spatula. Place the peaches on top, cut side down.

Roll out the dough to a rectangle large enough to cover the tart. Carefully brush a light coating of egg white on the crust edge and a little on the peaches, to encourage the top pastry to adhere. I like to roll the top pastry just before baking so it settles effortlessly over the filling and is pliable enough to seal well. You can roll it earlier and keep it chilled: just ensure it returns to a floppy state before it goes on top.


Place the pastry top over the filling
To do this, shimmy a spare tart tin base or a thin flat board under the pastry and slide the pastry into position on the peaches. Do this carefully, as the egg wash will adhere it to the top immediately. 
(This step didn't work for me and the pastry cracked into pieces. I cut the rectangle into 3 separate pieces and placed each third separately, overlapping each piece slightly which seemed to work out fine). Push the top pastry down to meet the cooked pastry on the side and pinch the excess off with your fingers. Use a knife to poke a few steam-release vents in a pretty pattern over the pastry top.


Bake in a 190°C (375°F) conventional oven for 45 minutes until light golden and a little puffed. You want to preserve the golden glow of the polenta, so don't over-brown. If a few cracks form on top, they will settle upon cooling. Cool the pie for at least 2 hours before dredging with icing sugar and slicing into generous wedges.


The end result - beautifully soft roast peaches, and a vanilla custard filling encased in a crunchy polenta pastry. Who could not love this combination. The pastry is a bit tricky though so I'm wondering whether I could polentarize my almond shortcrust pastry recipe, which is much easier to deal with. Watch this space.


See you all again next week with some more baking from my kitchen.

Bye for now,

Jillian

PRINT RECIPE

chocolate stout cake

7 Oct 2024


This is another classic story of cake redemption. Quite a few years ago I jumped onto the stout cake bandwagon and whenever I made it, using Nigella Lawson's recipe, it was very well received. One of my colleagues so liked the cake that she made it for her daughter's 21st birthday. For reasons I'm unsure of, I stopped making it.


Last month, a workmates' birthday came up and I decided to dust the cobwebs off the chocolate stout cake recipe. I topped the cake with my absolutely amazing Natalie Paull inspired cream cheese icing. T
he cake was a roaring success but I didn't photograph it, so I made another chocolate stout cake just so I could share the recipe with you. I took the cake into work and I can report that my workmates didn't mind one little bit.


Here's the recipe for you which makes a 17cm cake. If you'd like to make a larger version, I've added a link to the original recipe - see below - which makes a 23 cm cake. For all my recipes I use a 250ml cup and a 20 ml tablespoon, unsalted butter and 60g eggs. My oven is a conventional gas oven so if your oven is fan forced you may need to reduce the oven temperature by 20°C.


Chocolate stout cake, adapted from a Nigella Lawson recipe.
Ingredients
120 mls stout
120g unsalted butter
30g cocoa 
200g caster sugar
65g sour cream at room temperature
1 large egg
2 tsp vanilla extract
140g plain flour
1 tsp bicarbonate of soda

Icing
80g full fat softened cream cheese
80g unsalted butter, squidgy soft 
1 tsp vanilla paste
25g dried milk powder
pinch salt
80g icing sugar

Method
Preheat the oven to 180°C, conventional and grease, flour and line the base of a 17cm springform tin with baking paper.

Pour the stout into a large wide saucepan, add the butter — in spoons or slices — and heat until the butter's melted, at which time you should whisk in the cocoa and sugar. Beat the sour cream with the eggs and vanilla and then pour into the brown, buttery, beery pan and finally whisk in the flour and bicarb soda.


Pour the cake batter into the greased and lined tin and bake on the centre rack for 45 minutes to an hour. Leave to cool completely in the tin on a cooling rack, as it is quite a damp cake. When the cake's cold, sit it on a flat platter or cake stand and get on with the icing.


Icing
Place the cream cheese, butter, vanilla paste, milk powder and salt in the bowl of electric stand mixer. Sift the icing sugar over the top. Beat with the paddle attachment for 10 minutes on speed 4 (below low) until pale, and fluffy. Store covered in the fridge until needed. If refrigerated, rewarm in the microwave in 20-second bursts until softened. 


Ice the top of the black cake so that it resembles the frothy top of the famous pint.


The cake is a thing of beauty in its simplicity and I believe this is the correct cake to icing ratio.

See you all again next week with some more baking from my kitchen.

Bye for now,

Jillian

PRINT RECIPE

mango passionfruit lamingtons

21 Jan 2024


It's become a tradition on the blog to make something lamington inspired for Australia Day. Last year I made raspberry lamingtons; this year I made a batch of tropical flavoured mango and passion fruit lamingtons.


I used the brown butter sponge recipe from Beatrix Bakes and dipped the lamingtons in mango jelly inspired by this recipe here. The cakes were sandwiched with passionfruit curd and unsweetened whipped cream. If making curd isn't your thing, just buy some lemon curd and stir through some passionfruit pulp. The lamingtons are best made over 2 days giving time for the cakes to firm up before they're dipped.

Here's the recipe for you which makes 12 lamingtons. For all my recipes I use a 250ml cup and a 20 ml tablespoon, unsalted butter and 60g eggs. My oven is a conventional gas oven so if your oven is fan forced you may need to reduce the oven temperature by 20°CThe cake and curd should be made the day ahead and the mango jelly prepared a few hours before dipping the lamingtons.


Mango passionfruit lamingtons – makes 12
Brown butter sponge
160g plain flour
½ tsp salt
4 room temperature eggs 
150g caster sugar
85g unsalted butter
1 tsp vanilla extract

Passionfruit Curd
2 eggs
60 ml passion fruit pulp, reserve 1 tbs
60 ml lemon juice
80g caster sugar
60g unsalted butter, softened and cut into small cubes

Mango Jelly
1 mango, peeled
85g pkt mango jelly crystals
250mls boiling water

Topping and filling 
1 cup each shredded coconut and desiccated coconut 
½ cup passionfruit curd
300ml thickened cream, lightly whipped with ½ tsp vanilla bean paste
 
Sponge
Preheat the oven to 180°C, conventional. Grease and flour the 12 holes in a friand pan. Set aside while making the cake batter.

Sift the flour with the salt onto a piece of baking paper and set to one side. Over a pot of barely simmering water, heat the sugar and the eggs in the mixer bowl until they are hot to the touch. Pop the mixer bowl onto the stand mixer or use an electric hand whisk and whisk for 8 minutes on a medium/high speed until the egg mix is pale, fluffy and can hold a peak. While this is whisking, brown the butter. Either heat the butter in a saucepan over a low heat until the butter starts to turn a toasty brown or do this step in a covered bowl in the microwave. It usually takes about 5 minutes on high in the microwave but check every minute or so. You should have about 75g of browned butter. Remove from heat, add the vanilla and set aside. 


Gently scrape the egg mix into a wide, large-ish mixing bowl. Sift over half the flour/salt mix and gently fold in with a whisk, turning the mix over while spinning the bowl slowly. Fold in the remaining sifted flour until it has been fully incorporated. Slowly pour in the warm melted butter mix and fold in. Divide among the friand holes and bake for 20 minutes or until light golden and a skewer inserted in the centre comes out clean. Cool slightly, then cut around each friand to release before turning out onto a wire rack to cool completely. Once cool, refrigerate overnight in a sealed tin. 

Passionfruit curd
To make the passion fruit curd, place the eggs, passionfruit pulp, lemon juice and sugar in a bowl over a pan of simmering water. Stir continuously with a wooden spoon for 8 minutes, until thick, then remove from the heat. You can also do this in a heatproof bowl in the microwave. Microwave on medium for 4-6 minutes, stirring every minute or until thickened. Pass the mixture through a sieve and whisk in the butter. Spoon through the reserved passionfruit pulp. Leave to cool before storing in a sealed container in the fridge.

Mango jelly – you’ll need to start this process an hour or two before dipping.
Put the cakes into the freeze before making the jelly. Process the flesh of 1 mango until smooth to give about 2/3 cup. Combine the jelly crystals in a bowl with 1 cup (250ml) boiling water, stirring to dissolve crystals. Stir in mango pulp. Chill until jelly starts to set around the edge of the bowl.


Assembly
Once that’s done, set up a dunking station with your sponges, bowl of jelly, a wire rack, a small bowl of cold water (this has great non-stick properties), a tray of mixed coconut, and a resting tray for the completed lamingtons.

If the cakes have risen slightly, slice off the tops to give a flat surface. Dip each lamington into the jelly mixture, place on a wire rack over the jelly bowl to drain off any excess jelly. Dip your fingers in the cold water and pick up the lamington and place in the coconut and then roll the lamington in the coconut. Place the lamingtons on the resting tray then refrigerate for about 1 hour, or until the lamingtons have set. Refresh the coconut as needed.


When dry, cut the cakes in half horizontally. Spread one half with curd (1-2 tsp each); pipe or spoon the whipped cream on top and then sandwich together. Repeat with remaining cakes. Store in an airtight container in the fridge for up to 2-3 days.


See you all again next week with some more baking from my kitchen. 

Bye for now,

Jillian
PRINT RECIPE

xmas 2023 - toasted pecan cookies with dulce de leche

19 Dec 2023


During the year I took out a copy of the Beatrix Bakes Cookbook by Natalie Paull from my local library. I love Natalie's use of bold flavours and her clear explanations. I'd hoped to visit her bakery when I visited Melbourne this year only to find it had closed its doors for good just a few weeks earlier.

When I was looking for cookies to bake for Christmas, I immediately thought of the almond jaws or toasted almond cookies with dulce de leche that I'd found in the book. Naturally I made a few changes to the recipe. I had pecans in the fridge so I swapped out the raw almonds for pecans. I skipped the demerara sugar topping and sandwiched the biscuits with pre-made dulce de leche I had lurking in my pantry. I also made the cookies smaller so the recipe yielded 32 sandwich cookies rather than the 16 in Natalie's recipe.


Here’s the recipe for you which 
makes 32 biscuits. For all my recipes I use a 250ml cup and a 20 ml tablespoon, unsalted butter and 60g eggs. My oven is a conventional gas oven so if your oven is fan forced you may need to reduce the oven temperature by 20°C. The biscuits will keep for two weeks in the fridge or 4 days at room temperature.

Toasted pecan cookies with dulce de leche 
Filling
400g tin of dulce de leche 
pinch
 salt flakes

Ingredients
230g unsalted butter, diced and cool, not cold
80g icing sugar mixture
1 tsp vanilla extract
100g pecans roasted to golden brown and cooled
300g plain flour
5g fine sea salt
3g baking powder – around ½ tsp

To decorate
icing sugar

Method
For the dulce de leche filling, spoon the contents of the tin into a bowl and mix until smooth before stirring in the salt flakes. Set to one side.

For the biscuits, in a stand mixer, cream the butter, sugar and vanilla together until soft and white with a paddle on a medium speed. Scrape down the sides twice. This takes around five minutes.

Grind the nuts with about 50g of the total flour amount and set aside.
Mix the remaining flour with the salt and baking powder and then mix in the nut flour.

Add the dry ingredients to the creamed butter, taking care not to overwork the dough but don’t leave any butter streaks as it will cause buttery fissures (not pretty but still delicious) when baked. Do this on low speed for around one minute. Form dough into fat discs, wrap in plastic and allow to rest in the fridge for fifteen minutes.

Preheat the oven to 170°C, conventional and line 2 trays with baking paper. Roll 
out one disc of the dough on a lightly dusted surface to around 3 mm thick. You can roll the dough between two sheets of baking paper but do keep flouring so the dough moves as you roll.


Cut the cookies with a 5cm diameter cutter. Place on a baking paper lined tray and put back in the fridge to firm up before baking. Bake at 170°C, conventional until deep golden all over – around 20 to 30 minutes. Repeat with the other disc of dough. Cool for 10 minutes on the tray before removing to a wire rack. Allow to cool completely before filling. 


When cool, either pipe the dulce de leche on one cookie with a large nozzle or spoon and spread with a teaspoon, then sandwich with the top cookie, and lightly press (with a little swirly wiggle) to bring the filling just flush with the cookie edge. Just before serving dust with icing sugar.


These cookies were such a hit with my neighbour's children that they asked if I could make them for this year's Christmas cookie. I was happy to oblige.

See you all again tomorrow with some more baking from my kitchen.

Bye for now,

Jillian
PRINT RECIPE

apple filled cinnamon cookies

22 May 2023


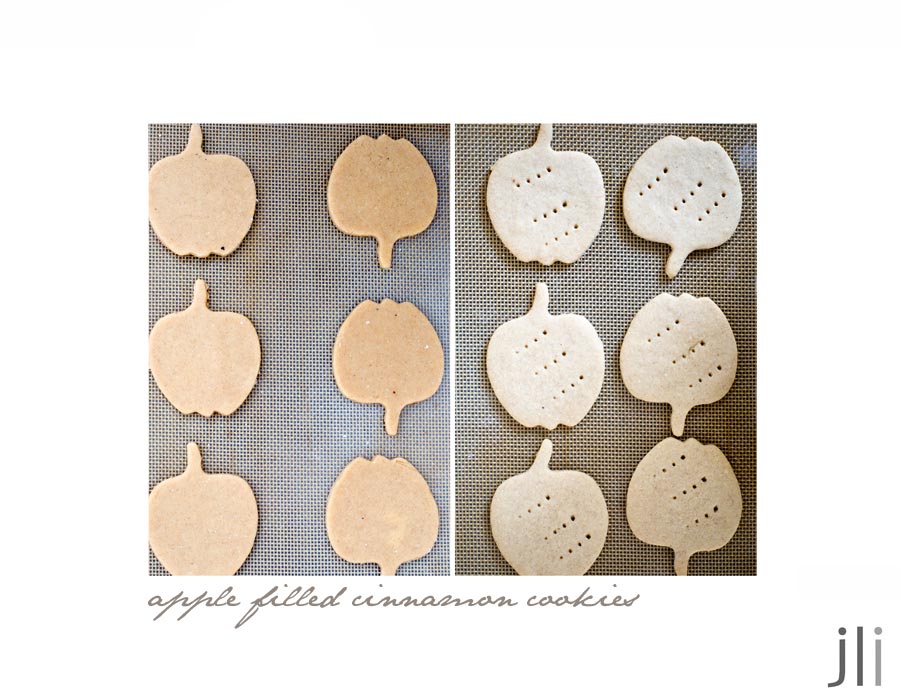
You can thank instagram for these cookies. I had 3 Granny Smith apples in my fruit bowl and wasn't sure how I was going to use them until I saw a photo of some apple filled cinnamon sandwich cookies on Beatrix Bake's instagram page. I then tracked down the recipe, set to work and here they are.

The recipe calls for a 7cm cutter, which I have, but whilst hunting for it I found this cute apple shaped cutter and how could I resist her? I divided the dough into two equal pieces and made seven 7cm cookies from one half and and 8 apple shaped cookies from the second half. As the apple shaped cookies are a little smaller, I had a little filling and icing left over.


If you'd like to make the cookies, here's the recipe for you, adapted from
here. The recipe 
makes at least twelve 7 cm filled cookies or many more cute apple shaped ones. For all my recipes I use a 250ml cup and a 20 ml tablespoon, unsalted butter and 60g eggs. My oven is a conventional gas oven so if your oven is fan forced you may need to reduce the oven temperature by 20°C.


Apple filled cinnamon cookies - 
Cookie Dough 
100g room temperature unsalted butter
70g soft icing sugar
1 egg
180g plain flour
10g cornflour (cornstarch)
40g almond meal
1 tsp baking powder
½ tsp ground cinnamon (freshly ground is best)
pinch nutmeg
pinch fine sea salt 

Apple Gems Filling
1 granny smith apple (200g)
20g unsalted butter
40g real maple syrup

Cream Cheese Icing
150g soft icing sugar
40g unsalted butter, at room temperature
50g full-fat cream cheese, at room temperature
1 tsp vanilla paste 
teeny pinch sea salt flakes 

Cookie dough
Beat the butter and sugar in a roomy bowl with a stiff plastic spatula to make a smooth paste. Add the egg and mix together to make a lumpy paste – it doesn’t need to be fully incorporated. Stir the dry ingredients together and tip in. Take care not to overwork the dough but make sure there aren’t any visible butter streaks that will cause buttery fissures (not pretty but still delicious) when baked. You can also prepare the dough in a food processor. Scrape the dough out onto a lightly floured work surface. Give it a light knead then wrap and chill in the fridge for a minimum 1 hour before rolling out. 


Apple Filling
While the dough rests, prep the apple gems. Peel and coring the apple. Cut into neat 4 mm cubes and set aside. Heat the butter and maple syrup in a pan until foamy and caramelly brown. Fry the apple gems, tossing/stirring often until the cubes are translucent, tanned golden, about 5 minutes. Scrape onto a heatproof tray lined with absorbent paper to let the gems drain and cool. 

Cookies
Heat the oven to 150°C, conventional. Lightly spray two flat baking trays with cooking oil spray and line with baking paper or you can use silicone mats. 

On a lightly floured work surface, roll the dough to an even 4 mm thickness. Keep moving the dough and flouring underneath as you roll. If the dough cracks, it doesn’t matter - just collect up and re-knead lightly. If the cookies or dough stick to the work surface, shimmy an offset spatula underneath to loosen them. Use a 7 cm round cutter to stamp out the cookies. Immediately lift the cookie onto the lined baking tray. Collect up the scraps and roll again. Repeat the process with the remaining portion of dough until you have 24 cookies. 


Dock the cookies with the tines of a fork to prevent rising then bake on the centre rack for 30 - 40 minutes until set (when you can easily lift one up) and lightly tanned brown. Remove from the oven and place the trays on a wire rack to cool for 30 minutes before filling. 

Cream cheese icing
Place all the icing ingredients into the bowl of a stand mixer fitted with a paddle. Beat for 10 minutes on low speed until the icing is fluffy and ultra-creamy. It should hold its shape and not be melty or slack. If it slumps, chill and re-beat.


Assembly 
Lay half the cooled cookies, bottom side up, on a clean tea towel and pipe (or spoon) a blob of icing on each one. Press a heaped teaspoon of apple gems deep into the icing. To ensure the icing doesn’t form a crust, quickly sandwich with the top cookie and lightly press (with a little swirly wiggle) to bring the filling just flush with the cookie edge. Swipe a finger around the edge to neaten any stray icing. Chill for 10 minutes to set the cookie before serving. 


Sometimes when baking, the finished product is less than the sum of it's parts but not in this case. The finished product was just divine - a delicate biscuit sandwiched with maple flavoured apple gems encased in a creamy filling. What's not to love? I shared the cookies with the neighbours who also thought they were delicious and enjoyed my cookie with a cup of tea.


Many thanks to Natalie Paull for another stellar recipe.

See you all again next week with some more baking from my kitchen.

Bye for now,

Jillian
PRINT RECIPE

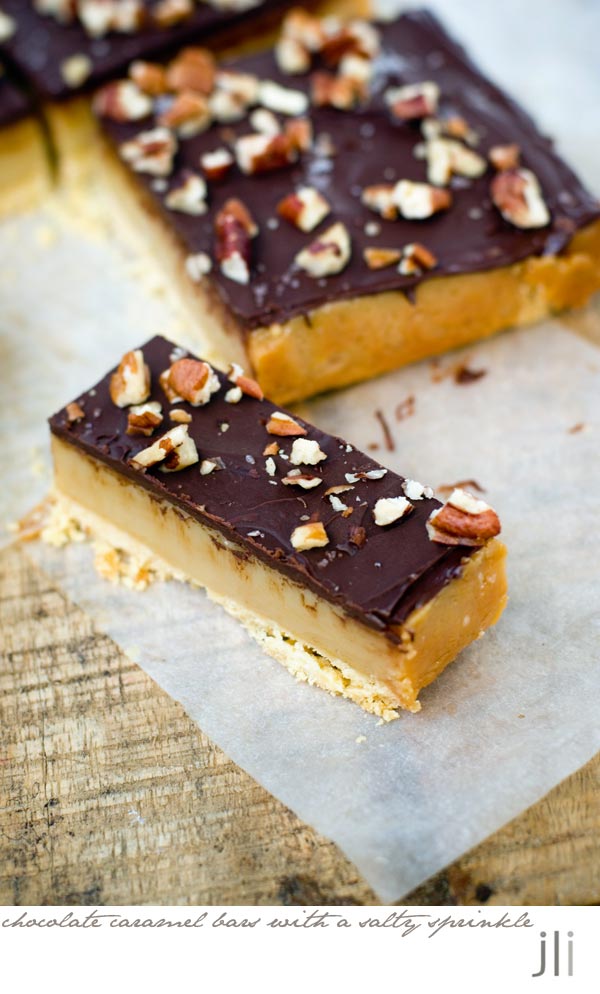
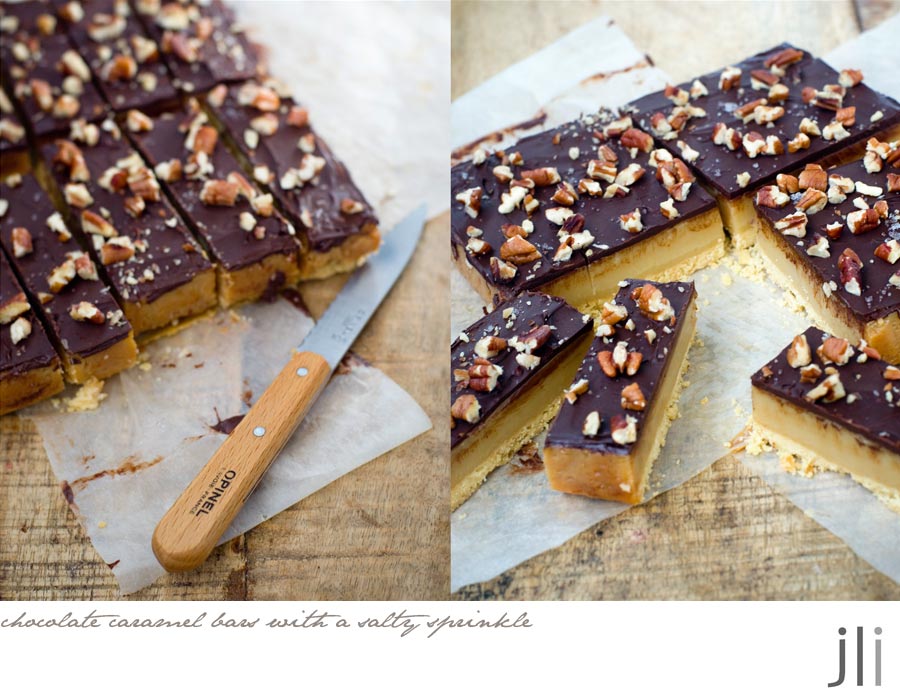
chocolate caramel bars with a salty sprinkle

19 Mar 2023


When I first saw this Beatrix Bakes recipe in a magazine, I thought to myself, do I really need another chocolate caramel slice recipe? I've been tweaking my recipe for years and I think it's pretty much perfect. It's also really popular with my workmates.


When I examined the recipe closely, it does vary a little from the classic recipe. 
Topping the slice with toasted nuts and sea salt is something I've done before, however the base and filling are a little different.

The base is a classic shortbread base without the addition of the usual coconut or almond meal. The caramel uses hard to find dark corn syrup with a little brown sugar rather than the usual golden syrup. I couldn't find dark corn syrup anywhere, so I used light corn syrup and added a little golden syrup. Molasses probably would have been better, but I didn't have any of that either. The recipe is butter heavy, so much so that I didn't have enough butter in the fridge to make a full batch. I made a half batch of the base and the chocolate topping but used the full amount of filling because can you really have too much caramel?

Here's the recipe for you which makes twelve (approximately) 2-inch x 3.5-inch bars. For all my recipes I use a 250ml cup and a 20 ml tablespoon, unsalted butter and 60g eggs. My oven is a conventional gas oven so if your oven is fan forced you may need to reduce the oven temperature by 20°C.

Chocolate caramel bars with a salty sprinkle
Base
180 g unsalted butter 
220 g plain (all-purpose) flour
50 g icing (confectioners’) sugar
¼ teaspoon fine sea salt

Caramel filling
380g sweetened condensed milk
50g dark brown sugar
75g corn syrup
25g golden syrup
100g unsalted butter
2g fine sea salt
1 tsp vanilla paste

Topping
25g pecans or natural walnuts
100g dark chocolate (60–70% cocoa), coarsely chopped
10g unsalted butter
pinch sea salt flakes

Method
Preheat the oven to 160°C, conventional. You will need a 17cm/7-inch square tin. Cut two pieces of baking paper as wide as the tin and long enough to cover the sides, with some excess paper overhanging. Spray the tin with cooking oil spray and lay one piece of paper across the base of the tin and up the sides, then place the second piece on top (to form a crosshatch). The paper will allow you to lift the slice out of the tin easily.

Base
Melt the butter and leave to cool a little. Put the flour, icing sugar and salt in a heatproof mixing bowl and stir to combine. Pour the butter into the dry ingredients and mix with your hands to form a sticky paste. Press the mix into the prepared tin and smooth it out with an offset spatula.

Bake for 45 minutes until the base is a tan biscuity colour. If any bubbles form under the base while baking, just prick them with a skewer to gently deflate them. Place the pecans (for the topping) on a baking tray and toast them, at the same time as the base, for about 20 minutes, or until deep golden brown.

Clean the mixing bowl. Choose a saucepan that will allow you to nestle the bowl on top, without it touching the water below. Fill the pan with 5 cm of water and bring to a gentle simmer on the stovetop.


Caramel filling
Put all the filling ingredients in the cleaned bowl. Place the bowl on top of the pan of simmering water over a medium–low heat, stirring well occasionally, until the butter has fully melted and emulsified. The consistency should be thick and gloopy and the colour just a shade darker – this will take about 10 minutes. Set aside at room temperature. 

Take the pecans out of the oven and cool to room temperature. As soon as the base is ready, remove from the oven and immediately scrape the caramel filling over the top. If the base cools too much, it will recede from the sides of the tin, which will leave the edges of the baked filling without a base underneath it (still delicious though!)

Return the filled base to the oven and bake for 15–20 minutes. If it starts to brown too quickly, reduce the oven slightly and continue to bake. When cooked, the middle will feel set and a little rubbery (be careful when you touch it – it’s caramel hot) and the sides should be starting to blister and turn light brown. Remove and leave to cool completely for 1–2 hours at room temperature.


Topping
Melt the chocolate and butter in a heatproof bowl over a saucepan of just-boiled water. Stir thoroughly and then pour over the top of the caramel. Smooth lightly with an offset spatula or simply tilt the tin to distribute the chocolate. Crush the walnuts with your hands over the top and sprinkle over the salt flakes.

Cool the slice until the chocolate is set to your liking – glistening and runny (about 15 minutes) or firm (about 45 minutes). Take hold of the excess paper on the sides, then shimmy and lift the slice out of the tin and place onto a chopping board. Peel the paper away from the sides. Dip a serrated knife in hot water, dry and chop into 12 bars.


Keeps for one day at room temperature in an airtight container, then refrigerated for 1–2 weeks. Best eaten at room temperature.


I haven't had any of the slice yet and I'm not bringing it into work until Tuesday, so I'll let you know next week how my workmates found it. (edit - my colleagues loved, loved, loved this version and one colleague even asked for seconds!)

It's snuck up on me, but Easter isn't too far away which means that Passover is just around the corner. Next week is Passover week on the blog, a full 5 days of tasty treats made without flour and artificial raising agents but with loads of eggs, nuts, butter, fruit and vanilla. I hope you enjoy what I've made for you.

See you all again next week with some more baking from my kitchen.

Bye for now,

Jillian
PRINT RECIPE
© DELICIOUS BITES • Theme by Maira G.