SLIDER

smitten kitchen
Showing posts with label smitten kitchen. Show all posts

salted peanut tart

10 Aug 2025


I've had this salted peanut tart recipe bookmarked for ages but with so many other recipes that needed my attention, it fell by the wayside.


Whilst doing my research I discovered that peanut pie is a traditional recipe from the south made just like pecan pie but with peanuts instead of pecans. Instead of corn syrup, Deb Perelman
from Smitten Kitchen made her filling with golden syrup or honey with a touch of apple cider vinegar and I found a Martha Stewart recipe which did the same. T
here is always golden syrup in my kitchen, so after I bought a packet of salted peanuts, the time had come to finally make this salted peanut tart. 

I made the pastry and lined the tin and had every intention of parbaking the crust, but when the time came, I couldn't be bothered. When I make pecan pie I don't parbake the crust because the pie is in the oven for 45-60 minutes on a preheated oven tray, which gives the pastry plenty of time to cook. However, this salted peanut tart is only in the oven for 30 minutes, so although the edges looked nice and golden, the pastry was still a little blonde on the base. Next time I'd start the bake on a lower rack to give the base a bit more heat and then I'd move it to the centre rack to set the filling.

You might notice a little bit of a volcanic eruption happened to the tart. There was a plumber in the building and I had to leave the tart mid bake to talk taps, so I wasn't able to keep a close eye on the tart, and when I did the filling had erupted. If you'd like to avoid this happening, keep an eye on the tart during the final 5-10 minutes of the bake.


Here's the recipe for you adapted from here, which makes a 33cm rectangular tart. For all my recipes I use a 250ml cup and a 20-ml tablespoon, unsalted butter and 60g eggs. My oven is a conventional gas oven so if your oven is fan forced you may need to reduce the oven temperature by 20°C.  If you'd like to make a 23-cm tart, just follow the link to the original recipe for the quantities. 


Salted peanut tart
Pastry
1 cup plain flour
60 grams cold unsalted butter
Pinch sea salt flakes
2-3 tbs water

Pastry
Combine the butter, flour and salt in a food processor. Gradually add sufficient water until a dough forms around the blade. Wrap the dough in plastic and refrigerate for 30 minutes. Roll out on a lightly floured surface to a 4-mm thickness then line a lightly greased 33 x 11 cm rectangular tin with the pastry. Cover and refrigerate for at least 1 hour before trimming the edges just before filling and baking. 

Filling
245g salted roasted peanuts 
55g unsalted butter
110g sugar (I used an even mix of brown and caster sugar)
95g golden syrup or honey
2 eggs
1 tsp vanilla
1 tsp apple cider vinegar (optional)
1 tsp grated lemon rind (optional)

To serve
Sour cream or creme fraiche
Sea salt flakes
Icing sugar

Method
Place a tray onto the lower rack of the oven and preheat the oven to 200°C, conventional. 

Remove a 1/3 of the peanuts and set aside, then coarsely chop the remaining peanuts. Melt the butter in a saucepan over a medium heat until it starts to bubble. Continue cooking while whisking until it is golden brown. Immediately transfer to a bowl and leave to cool.

When cooled add the sugars, the golden syrup, the eggs, vanilla and vinegar (if using) to the bowl and whisk well. Finally stir in the chopped peanuts.


Pour the filling into the tart shell then top with the whole peanuts. Carefully place the filled tart onto the preheated tray; reduce the oven temperature to 180⁰C, conventional, and bake for 15 minutes. After 15 minutes move the tart, still on the tray, to the centre rack and cook for another 15 minutes or until the outside of the tart is set but the centre has a slight wobble. Allow the tart to cool completely before serving. 


If desired, you can dredge the tart with icing sugar just before serving. Serve with a dollop of sour cream or crème fraiche and a few sea salt flakes. 


If you have a peanut allergy, chopped toasted macadamia nuts would be a delicious alternative. 

This is a very tasty tart and it's not overly sweet. In fact I'd be inclined to  increase the sugar a little. Best of all, the pastry shell was nice and crispy even though it hadn't been parbaked and received special mention from my neighbour!

See you all again next week with some more baking from my kitchen.

Bye for now,

Jillian


PRINT RECIPE

chocolate compost brittle

7 Dec 2015

I like to make something from my kitchen to give to my neighbours and friends at Christmas time. I'm planning to make sour cherry amaretti this year but after reading this post from Smitten Kitchen I thought it would be nice to make some brittle as well. 


Inspired by this recipe for compost cookies, I thought I'd make some chocolate coated compost brittle using pretzels, popcorn and peanuts for the 'compost'.


I love peanut brittle and even though it's easy to make, I chose not to make it very often as it's way too addictive. 


I'm warning you because I don't think this version is any less addictive.


Here's the recipe for you. For all my recipes I use a 250 ml cup and a 20 ml tablespoon. My oven is not fan forced so you may need to reduce your oven temperature by 20°C.

Chocolate Compost Brittle
1 cup caster sugar
30 mls light corn syrup or golden syrup (I used 15 mls of each)
¼ cup water
30g butter
½ teaspoon bicarb soda (baking soda)
½ cup broken-up chunks of thin salted pretzels
½ cup roasted salted peanuts
½ cup coarsely crumbled salted popcorn pieces
125g coarsely chopped dark chocolate

Method
Preheat the oven to 150°C/300°F. Line a lamington tin (12 x 8 inch tin) with baking paper and place the pretzels, peanuts and popcorn on the tray. Put the tray in the oven to keep the pretzel mixture warm while you're making the toffee.

Combine the sugar, corn or golden syrup and water in a medium saucepan, stirring to combine. Cook without stirring until the temperature of the mixture reaches 150
°
C. Take the pretzel mixture out of the oven. Remove the saucepan from the heat and quickly stir in the butter, the warmed pretzel mixture and the baking soda (which will make the mixture froth up). Mix until the pretzel mixture is coated in toffee then immediately pour the brittle back into the paper lined pan. Using a knife or an off set spatula flatten out the brittle as much as possible. Leave the brittle to set. 

While the brittle is cooling, melt the chopped chocolate in a small bowl over simmering hot water or in the microwave. I reserve about 15-20% of the chocolate and put the rest of the chocolate into a small bowl. Zap the chocolate on high in 30 second bursts until most of the chocolate has melted. Give the chocolate a good stir until it has completely melted before adding the reserved chocolate. Keep stirring until the chocolate has completely melted.

Once the brittle is cool and has set, gently remove the brittle (still on the baking paper) and then turn it upside down onto a cooling rack. Remove the baking paper, then pour the chocolate over the flat base of the brittle smoothing it out using a spatula. Leave until the chocolate has completely cooled. If you can't wait, you can refrigerate the tray for about 20 minutes to speed up the setting process.

Once the chocolate has set break the brittle into shards. Store the shards of brittle in an airtight tin between waxed or baking paper. As its pretty warm in Sydney at the moment, my tin is stored in the bottom of the fridge to stop the chocolate from melting.


All packed and ready to share.

See you all again next week for a full week of posts for Christmas week 2015.

Bye for now,

Jillian
PRINT RECIPE

plate to plate - ottolenghi chocolate krantz cake

20 Apr 2015

When Juliana and I were trying to decide what to bake for this month's Plate 2 Plate post, we both knew we wanted to make something sweet. I'd seen photos of this Chocolate Krantz Cake from Ottolenghi's book, Jerusalem, all over the internet and suggested we give it a try.


Juliana agreed so it was as easy as that. The recipe makes 2 cakes and here are Juliana's photos of the 2 babkas she baked.


Despite having a Polish grandmother, I'd never eaten or made a krantz cake (aka babka) before. Reading through the recipe it looked very similar to a brioche dough, covered with a sinful chocolate spread, topped with toasted pecans then bathed in a sugar syrup. What's not to love? Here's my version of the process. As you can see, I took loads of photos!


Here are some of the ingredients Juliana used to make her babka. That Swiss butter sure beats my local butter hands down.


I'd not made brioche before and decided to make half a batch of the dough. I was a bit disconcerted with how little the dough rose.  I checked the bottom of my tin of yeast only to discover it had expired at the end of 2014. I ran out of time to bake the babka last weekend so put the dough back into the deep freeze and defrosted it Friday night.


I wasn't sure the dough would work out so Saturday morning I made another half batch of dough just in case, changing the technique substantially and it worked a charm. I'll be posting the original recipe with my changes added beneath. You can see that batch of dough in the picture above and that second batch of dough is now resting in the freezer waiting for me to whip it into another babka. I can't wait to see how the second batch of dough compares.


Juliana made the full batch of dough and made a chocolate babka and a cinnamon and walnut version. She baked the cinnamon and walnut babka in a round tin and commented how pretty that looked. I found a photo of a round babka which had dispensed with the tin entirely so I thought I'd give that a try. Here's Juliana hard at work twisting the babka dough and the 2 babkas ready for baking.


Deb Perelman of Smitten Kitchen suggested freezing the filled babka before halving and twisting the dough. There wasn't enough room in my freezer to do that but I did refrigerate the log for about 20 minutes. The folds fell apart a bit as I was twisting the dough but in the end it didn't seem to make a difference. Once the babka came out of the oven I dowsed it with the sugar syrup, which I'd infused with a cinnamon stick. I did reduce the quantity of sugar in the syrup a little as well. Again I'll write my changes in the notes.


Here it is, fresh from the oven. It's a thing of beauty, isn't it? I cut a piece and I can only say the chocolate babka is one of the most delicious things I've ever tasted.


I had a piece for my morning tea today and it still tasted pretty good. I zapped my piece in the microwave for 5 seconds to warm the chocolate filling and it was a very good decision. I'm taking the leftovers into work and I'll be interested in what my workmates have to say.


Here are the 2 babkas Juliana made. The cinnamon and walnut version in one the right, the chocolate babka on the left. 

Here's the recipe for you. The excerpt is from Jerusalem by Yotam Ottolenghi and Sami Tamimi.

'Making a krantz isn't easy or quick. You need to let the dough rise overnight and then fill and shape it, which is quite an elaborate process. Although this recipe makes two fairly large cakes, there isn't really any risk of anything going to waste. They are just the sort of thing everyone hurls themselves at as soon as they come out of the oven.They will also keep for up to two days at room temperature, wrapped in foil, and up to a couple of weeks when frozen'. Photos below by Juliana. Don't you just want to pour yourself a cup of tea and tuck into a slice or two?


'For a fabulous alternative to the chocolate filling, brush each dough half with 6 tbs/80 g melted unsalted butter and then sprinkle with ½ cup/120 g light muscovado sugar, 1½ tbs ground cinnamon, and scant ½ cup/50 g coarsely chopped walnuts; then roll as described in the chocolate version'. That's what Juliana did, as you can see below. I'm not sure which version she preferred.


Chocolate Krantz Cake from Jerusalem. Makes 2 loaves.

For the dough
4 cups/530 g plain flour, plus extra for dusting
½ cup/100 g caster sugar
2 teaspoons fast-rising active dry yeast
Grated zest of 1 small lemon
3 extra-large free-range eggs
½ cup/120 ml water
Rounded ¼ tsp salt
⅔ cup/150 g unsalted butter, at room temperature, cut into ¾ inch/2 cm cubes
Sunflower oil, for greasing

For the chocolate filling
Scant ½ cup/50 g confectioners’ sugar
⅓ cup/30 g best-quality cocoa powder
4 oz/130 g good-quality dark chocolate, melted
½ cup//120 g unsalted butter, melted
1 cup /100 g toasted pecans, coarsely chopped
2 tablespoons caster sugar

For the sugar syrup (enough for both cakes)
⅔ cup /160 ml water
1¼ cups /260 g caster sugar

Method
For the dough, place the flour, sugar, yeast, and lemon zest in a stand mixer fitted with the dough hook and mix on low speed for 1 minute. Add the eggs and water and mix on low speed for a few seconds and then increase the speed to medium and mix for 3 minutes, until the dough comes together. Add the salt and then start adding the butter, a few cubes at a time, mixing until it is incorporated into the dough. Continue mixing for about 10 minutes on medium speed, until the dough is completely smooth, elastic, and shiny. During the mixing, you will need to scrape down the sides of the bowl a few times and throw a small amount of flour onto the sides so that all of the dough leaves them.

Place the dough in a large bowl brushed with sunflower oil, cover with plastic wrap, and leave in the fridge for at least half a day, preferably overnight.

Grease two 2¼ lb/ 1 kg loaf pans (9 by 4 in/23 by 10 cm) with some sunflower oil and line the bottom of each pan with a piece of waxed paper. Divide the dough in half and keep one-half covered in the fridge.

Make the filling by mixing together the icing sugar, cocoa powder, chocolate, and butter. You will get a spreadable paste. Roll out the dough on a lightly floured surface into a rectangle measuring 15 by 11 inches (38 by 28 cm). Trim the sides to make them even, then position the dough so that a long side is closest to you. Use an offset spatula to spread half the chocolate mixture over the rectangle, leaving a ¾ in/2 cm border all around. Sprinkle half the pecans on top of the chocolate and then sprinkle over half the caster sugar.
 Brush a little bit of water along the long end farthest away from you. Use both hands to roll up the rectangle like a roulade, starting from the long side that is closest to you and ending at the other long end. Press to seal the dampened end onto the roulade and then use both hands to even out the roll into a perfect thick cigar. Rest the cigar on its seam.

Trim about ¾ in/2 cm off both ends of the roulade with a serrated knife. Now use the knife to gently cut the roll into half lengthwise, starting at the top and finishing at the seam. You are essentially dividing the log into two long even halves, with the layers of dough and filling visible along the length of both halves. With the cut sides facing up, gently press together one end of each half, and then lift the right half over the left half. Repeat this process, but this time lift the left half over the right, to create a simple, two-pronged plait. Gently squeeze together the other ends so that you are left with the two halves, intertwined, showing the filling on top. Carefully lift the cake into a loaf pan. Cover the pan with a wet tea towel and leave to rise in a warm place for 1 to 1
½ hours. The cake will rise by 10 to 20 percent. Repeat the whole process to make the second cake.

Preheat the oven to 375°F/190°C, making sure you allow plenty of time for it to heat fully before the cakes have finished rising. Remove the tea towels, place the cakes on the middle rack of the oven, and bake for about 30 minutes, until a skewer inserted in the centre comes out clean.


While the cakes are in the oven, make the syrup. Combine the water and sugar in a saucepan, place over medium heat, and bring to a boil. As soon as the sugar dissolves, remove from the heat and leave to cool down. As soon as the cakes come out of the oven, brush all of the syrup over them. It is important to use up all the syrup. Leave the cakes until they are just warm, then remove them from the pans and let cool completely before serving.

Notes
For the second batch of dough as I wasn't sure how active my yeast was, I doubled the quantity of yeast and activated it first with a tsp each of sugar and flour mixed with a tablespoon or two of water to make a paste and left it covered for 15 minutes until it was quite spongy.

I simplified the dough process by using the regular beater on my stand mixer to cream the butter and sugar together before adding the yeast mixture and the eggs. I added about half the flour to make a soft batter before switching over to the dough hook. I added in the remaining flour and sufficient milk/water to make a soft dough then mixed the dough for about 10 minutes. It was so much easier making the dough this way. I left the dough to prove for an hour before covering the dough and placing in the fridge overnight. The dough didn't double but it was probably 50% larger in volume this way.

I used a tsp vanilla extract instead of grated lemon rind in the dough and added ½ tsp ground cinnamon to the toasted pecan mix.

I pinched the 2 ends of the braid to form a circle, which I placed on a parchment lined baking tray. I baked the babka for closer to 40 minutes than 30 minutes.

I reduced the sugar in the syrup to ⅔ cup. Once the sugar had dissolved I simmered the syrup for 5 minutes with a cinnamon stick. I left the cinnamon stick in the syrup while it cooled and used all the syrup on the cake.


Please try this recipe as despite the number of steps, the outcome is so worth it. The cake is no delicate flower though - it's dense, moist, sweet, chocolately and crunchy all at the same time. 

Many thanks to Juliana for being my partner in Plate 2 Plate.


I'm flying to Singapore next Thursday to attend a conference, so if I have time I'll be back next week with some baking. If not, then I'll be posting from the road.


See you all again soon,


Jillian


    PRINT RECIPE

    linzer cookies

    24 Feb 2014

    Each month we hold a mega morning tea at work where every-one brings along something to share. Some-one brings dip, another person brings potato chips, someone else will bring fruit and I usually bake something. This month our morning tea had a Valentine's Day theme where we had to bring along something pink, red or heart shaped. 


    I haven't been well the past week so I spent most of Valentine's Day in bed feeling sad and a bit sorry for myself. Thankfully I found enough energy to pull these together. I thought I had all the ingredients in the flat but discovered I'd run out of butter requiring a trip up to the Junction. I always have a few blocks of butter lurking in the fridge so I don't know where it went to. 


    I've not made Linzer cookies before but they've been on my Christmas cookie list for quite some time. I adapted a Martha Stewart recipe which you can find here. Now great minds think alike 'cos look what I found on Deb's blog, Smitten Kitchen.


    I already had hazelnut meal in the cupboard so I toasted the meal and used it in the cookies. I whizzed the whole mixture in the food processor and honestly it took about 2 minutes to make the dough from woe to go.


    Here's the recipe for you.

    Linzer Cookies
    Ingredients
    70 g (2½ oz) hazelnut meal
    110 g (4 oz) unsalted butter, coarsely chopped
    ¼ cup caster sugar
    1 egg yolk
    ½ tsp vanilla extract
    1 cup plain flour, plus more for work surface
    ½ teaspoon baking powder
    ½ teaspoon ground cinnamon
    pinch nutmeg
    icing sugar, for dusting
    ¼ cup raspberry or berry jam

    Method
    Place the hazelnut meal in a small frypan and lightly toast over a medium heat. Remove from the heat and place the meal into a small bowl. Leave to one side until cool.

    In a food processor, combine the hazelnut meal, the flour, baking powder, cinnamon and nutmeg. Whiz for a few seconds to combine. Add the butter mixture and whiz until the mixture forms breadcrumbs. Add the vanilla to the lightly beaten egg and add to the mixture. Process until a soft ball forms around the blade. Remove the dough from the blade and form into a flattened disk and wrap with plastic wrap. Refrigerate the dough until firm, at least 1 hour or overnight.

    Preheat the oven to 180°C/350°F. Line 2 baking trays with baking paper. On a lightly floured work surface, thinly roll out half the dough. Using a medium size fluted cutter, cut out cookies. Transfer the cookies to the prepared baking tray. Using a small cutter, cut the centres out of half the cookies. Combine the scraps, reroll and cut. Be careful not to incorporate too much flour or the pastry will be too crumbly to roll. You may need to add a few drops of water to the cookie dough.

    Bake in the preheated oven until the edges are golden, 8-9 minutes, rotating the tray halfway through the cooking time. Remove the tray from the oven; allow the cookies to cool a little before transferring to a wire rack to cool completely.

    Lightly sift the icing sugar over the decorative tops; set aside. Place a teaspoon of jam on the bottom of each cookie, and sandwich with the sugar-dusted tops. Makes about 20 sandwich cookies.


    Now these were so popular they disappeared before I had a chance to try one. I froze some of the dough so when I have time I'll bake a few for my cookie jar.


    I hope you all had lovely weekends. 

    See you all again soon,

    Jillian
    PRINT RECIPE

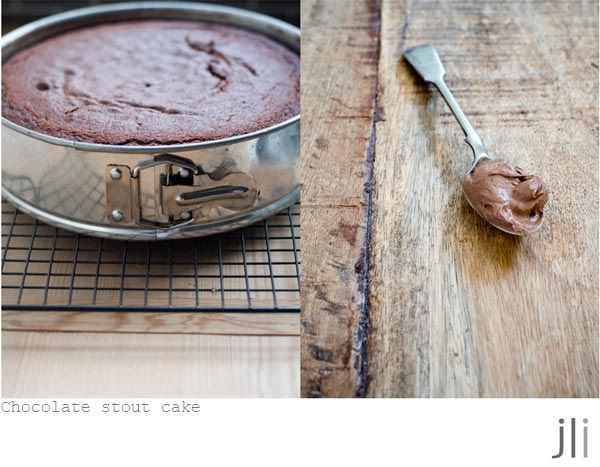
    Chocolate Stout Cake

    17 Oct 2011

    Last year I made some Chocolate Stout cupcakes with cream cheese icing. Whilst they were tasty, I couldn't get any-one to eat them. I ate most of them myself and gave the rest to my workmates with sons. I thought I'd try making the recipe again but this time I made a cake rather than cupcakes. Once the cake was baked and cooled, I put it into the deep freeze and pulled it out last week for a friend's birthday morning tea.

    chocolate stout cake

    Whilst I liked the flavour of the cupcakes, I didn't like the texture very much. I hunted down another recipe (they're all very similar by the way) and settled on this one on Smitten Kitchen but I changed the recipe substantially.


    I ditched the melt and mix method instead creaming the butter and sugar before combining the eggs. I reduced the sugar substantially and added some yoghurt with the sour cream to lighten the mixture. The cake came out sky high and very moist. Of course when the time came to ice the cake, I had to use my favourite cream cheese icing recipe, using a bit of sour cream to tie in all the flavours.


    I'm not really a chocolate cake fan, so I didn't have a slice but I tasted the crumbs and scraped the bowl and can tell you its a pretty tasty cake. What did my work colleagues think?

    I think to say it went down well was a bit of an understatement. As the word went around that I'd baked a chocolate cake, people came out out of the woodwork. The recipe was requested and I was told it was the best chocolate cake they'd ever tasted. There's another farewell morning tea coming up soon, and I've made a small version cake using this recipe but this time I'm going to ice it using some leftover ganache I found in the freezer. I'll let you know what the test audience thinks.

    I hope you all had great weekends. I did a bit of shopping, lots of baking, met a friend for sushi and watched the Australia vs New Zealand Rugby World Cup semi-final. Congratulations to New Zealand who were certainly the better team on the day.

    See you all Wednesday and don't forget to send me your favourite Christmas baking recipes,

    Jillian
    PRINT RECIPE
    © DELICIOUS BITES • Theme by Maira G.