SLIDER

the cook and baker
Showing posts with label the cook and baker. Show all posts

lamington cupcakes

28 Jan 2019


I've been looking forward to the Australia Day long weekend pretty much since I returned to work in the New Year. I planned to make a lamington roll to share with you and was so organised, I baked it a week early. It was an absolute disaster and as I was going away for the Long Weekend it looked as though I'd have nothing to share with you.


I came home a little earlier than planned and went straight to the kitchen to make Plan B, some lamington cupcakes from the Cook and Baker. I adapted the recipe a little; halved the recipe and added a buttermilk soak. The cupcakes didn't rise a great deal and as I was pretty tired, I wasn't sure if I'd used plain flour instead of self raising, so I went to bed in 2 minds whether to make something else for you or complete the process. In the end I did both!


I've had no lunch or breakfast so my caloric intake today has consisted of chocolate icing, coconut, whipped cream and cups of tea. I've literally just finished cleaning the mess made from dipping the cakes in chocolate icing. I can't tell you how many times I've swept the floor in a futile attempt to remove all the coconut from the kitchen floor. I now remember why I only make lamingtons once a year. It's a real fiddle but the end result is pretty delicious.


Here's the recipe for you, slightly adapted from original recipe from The Cook and Baker and you'll need to start this process a day ahead. If you don't feel like making jam from scratch, shop bought is fine.

For all my recipes I use a 250 ml cup, a 20 ml tablespoon, unsalted butter and 60g eggs. My oven is a conventional gas oven so if your oven is fan forced you may need to reduce the oven temperature by 20°C.

Cake
300 g (10½ oz/2 cups) self-raising flour
40 g (1½ oz/1⁄3 cup) cornflour (cornstarch)
pinch salt
340 g (12 oz) unsalted butter, softened
330 g (11¾ oz/1½ cups) caster (superfine) sugar
1 teaspoon natural vanilla extract
4 eggs, at room temperature
200 mls milk

Buttermilk Soak

1/4 cup milk 
½ cup buttermilk
3 tsp caster sugar 
½ tsp vanilla extract

Lamington Dip

160 g (5¾ oz/1½ cups) dark cocoa powder
500 g (1 lb 2 oz/4 cups) icing (confectioners’) sugar
100 g (3½ oz/2⁄3 cup) chopped dark chocolate 
500 ml (17 fl oz/2 cups) boiling water 

To serve

320 g (11¼ oz/1 cup) Berry Jam 
350 g (12 oz/5 1⁄3 cups) thread (shredded) coconut, for coating  
Whipped Cream, to serve

Preheat the oven to 180°C (350°F). Lightly grease and flour two 12-hole standard 250 ml (9 fl oz/1 cup) muffin tins.


Sift together the flour, cornflour and salt, and set aside. Use an electric mixer with a beater attachment to beat the butter and caster sugar until pale and creamy. Add the vanilla and then beat in the eggs one at a time. If the mix starts to curdle, add a tablespoon of the sifted flour. Fold in the rest of the sifted dry ingredients, then add the milk and mix until just incorporated.


Spoon the batter into the prepared tins. Bake for 25-30 minutes or until the sponge springs back when gently pressed on top. While the cakes are baking prepare the buttermilk soak. Combine all the ingredients in a small jug and stir until the caster sugar is dissolved. Cool the cakes for about 10 minutes in the tins before turning out. Place the cakes on a rack over a tray to catch any drips. Using a fine skewer, poke a few holes in the top of each cake before spooning a few teaspoons of the buttermilk soak over each cake. Allow the cakes to cool completely before storing overnight in the fridge in an airtight container.


For the lamington dip: Sift the cocoa powder and icing sugar into a medium bowl. Add the chopped dark chocolate and pour over the boiling water,½ cup at a time until you reach the right dipping consistency. Whisk until combined and the chocolate has melted. Strain through a sieve to remove any lumps and allow to cool. If the mixture is too thick just add a little more boiling water.


To assemble: Cut each sponge in half and sandwich together with the raspberry jam. Carefully dip each one into the lamington dip, drain off any excess chocolate and roll in the coconut threads to coat. Place on a wire rack to dry. 
Serve with whipped cream.

Note: Store in an airtight container for up to 2-3 days.


Berry Jam

Makes about 1.25 kg (2 lb 12 oz/4 cups) • Preparation time 30 minutes plus 10 minutes standing time • Cooking time 40 minutes

Ingredients

1 vanilla bean
1 kg (2 lb 4 oz/8 cups) raspberries and strawberries (halved) fresh or frozen
495 g (1 lb 1½ oz/2¼ cups) caster (superfine) sugar
juice of 1 lemon

Split the vanilla bean in half lengthways, then scrape the seeds from the halves using the tip of a sharp knife.


In a heavy-based saucepan, put the berries, sugar, lemon juice, vanilla bean and seeds, and 125 ml (4 fl oz/½ cup) water. Stir constantly over low heat until the sugar is dissolved, approximately 5 minutes.


Bring to the boil, then reduce the heat. Simmer uncovered, stirring occasionally, for approximately 20-25 minutes until the mixture will jell when tested on a cold saucer.


Discard the vanilla bean. Stand the jam for 10 minutes to settle before pouring into hot sterilised jars.


Note: Store in a cool, dark place for up to 12 months. Once opened, keep in the fridge and use within 1 month.


I hope you enjoyed your Australia Day Long Weekend. See you all again next week with some more baking from my kitchen.

Bye for now,

Jillian
PRINT RECIPE

mini lime meringue tarts

26 Feb 2018


Last weekend I met a friend for dinner and I always like to bring along something sweet to share so I decided to make some mini tarts. 


I used the passionfruit tart recipe from the Cook and Baker as my inspiration, then took the recipe from there. These little meringue tarts take a bit of time and effort but they are very tasty and look cute as well. 


It's lime season here so I decided to make lime meringue tarts. I made the tarts on one of the hottest days of the year so had all kind of problems rolling out my usually foolproof pastry recipe. I persevered and all went well in the end but I only made 12 tarts and put the remaining pastry back in the freezer for another day.


The tarts are best eaten the day they're made but if you store them in the fridge, they're still okay the next day. Don't store them at room temperature though as the pastry will soften. If making meringue isn't your thing you could always top the tarts with a dollop of cream topped with some grated lime rind.


Here's the recipe for you which makes 24 tarts. For all my recipes I use a 250ml cup and a 20 ml tablespoon, unsalted butter and 60g eggs. My oven is a conventional gas oven so if your oven is fan forced you may need to reduce the oven temperature by 20ºC.


Miniature Lime Meringue Tarts 
Almond shortcrust pastry
110g (4 oz) cold unsalted butter, diced
¼ cup icing sugar (confectioner’s sugar)
¼ cup almond meal
1⅓ cups plain flour
1 egg, lightly beaten
Cold water

Filling
2 egg yolks
1 tsp finely grated lime rind
200g condensed milk
120 mls lime juice

Topping
3 egg whites
180g caster sugar
Pinch of salt

Pastry
To make the pastry, combine all the dry ingredients in a food processor, and whiz for a few seconds until well combined and free of lumps. Add the cold butter and whiz until the mixture resembles breadcrumbs. Add the egg and sufficient cold water and whiz until a soft dough just starts to form around the blade. Remove the dough from the food processor and gather the pastry into a ball; flatten slightly before wrapping in plastic and placing in the fridge. Refrigerate the pastry for 30 minutes.

Grease a 12 cup miniature muffin tin. Cut the pastry in half. Roll out the pastry quite thinly, cut into twelve 6 cm rounds then press the pastry gently into each tin before trimming the edges. Line each cup with a small square of baking paper and fill with baking beans. Chill for 30 minutes before baking. Preheat oven to 190°C and bake the pastry shells for 20 minutes or until golden brown. Allow to cool completely before removing the shells from the tray. Repeat the process with the remaining pastry. The shells can be stored in an airtight container until ready to be filled.

Filling
Lower the oven temperature to 170°C. In a small bowl, combine the egg yolks with the lime rind. Stir in the condensed milk followed by the juice. Mix thoroughly and return the mixture to the fridge for 10 minutes to allow the mixture to infuse. Pour the filling through a fine sieve into a jug before filling the pastry cases. Bake the tarts for 10-15 minutes or until the filling is just set. Allow to cool completely before refrigerating the tarts for at least an hour. Repeat with the remaining shells.

Topping
Preheat oven to 200°C. Bring a saucepan of water large enough to fit your stand mixer bowl to the boil. Put the egg whites, sugar and salt in the bowl of the mixer and whisk to combine. Reduce the heat under the pan so the water is just simmering, then place the bowl on the pan, making sure the water doesn’t touch its base. Whisk the eggs for five minutes by hand or using a hand mixer, until very warm, then put the bowl back on the electric mixer stand and whisk for about five minutes on a high speed, until the meringue is stiff and cool.

Place the meringue into a piping bag fitted with a 1.5 cm plain tube and pipe decoratively over the filling. You can leave the tarts as is or you can colour the meringue using a brulee torch or under the grill. I prefer to bake the tarts for 10 minutes or until the meringue is lightly coloured. Cool on a rack before returning to the fridge to firm up the filling.


See you all again next week with some more baking from my kitchen.


Bye for now,


Jillian


PRINT RECIPE

passionfruit meringue tart

8 May 2017

Whilst rearranging my deep freeze I found some almond shortcrust pastry and decided it was time to bake a tart. I found nets of passionfruit at the store so I came home with a bag and set about creating a passionfruit meringue tart.


This tart recipe was inspired by the one for mini passionfruit tarts I found in 'The Cook and Baker' recipe book. The filling is a key lime pie filling which uses eggs, condensed milk and lemon and passionfruit juice instead of lime juice. The filling comes almost directly from the book, whilst the pastry and topping are my own. 


The recipe has a number of steps. You can certainly make the tart shell ahead of time but there's a lot of cooling and resting involved so leave plenty of time when making this. However the end result is so delicious I think it's worth the effort.


The tart is topped with masses of billowy meringue and the meringue is only lightly sweetened so it nicely balances out the filling.


Here's the recipe for you which makes a 17 cm tart. If you'd like to make a 23 cm tart, just double all the ingredients for the filling and topping as the almond pastry recipe is sufficient to make a 23 cm tart shell. Please note for all my recipes, I use a 250 ml cup and a 20 ml tablespoon. All eggs are 60 grams and my oven is a conventional oven not fan forced, so you may need to reduce your oven temperature by 20°C.


Passionfruit Meringue Tart
Almond shortcrust pastry
110 g (4 oz) cold unsalted butter, diced
¼ cup icing sugar (confectioner’s sugar)
¼ cup almond meal
1⅓ cups plain flour
1 egg, lightly beaten
Cold water

Filling
2 egg yolks
1 tsp finely grated lemon rind
200 g condensed milk
60 mls lemon juice
65 mls strained passionfruit juice

Topping
2 egg whites
113 g caster sugar

Pastry
To make the pastry, combine all the dry ingredients in a food processor, and whiz for a few seconds until well combined and free of lumps. Add the cold butter and whiz until the mixture resembles breadcrumbs. Add the egg and sufficient cold water and whiz until a soft dough just starts to form around the blade. Remove the dough from the food processor and gather the pastry into a ball; flatten slightly before wrapping in plastic and placing in the fridge. Refrigerate the pastry for 30 minutes. You’ll only need about half of the pastry dough for this recipe. The pastry freezes well so just wrap the remaining pastry in plastic wrap and store in the freezer.

Grease a 17cm springform tin. Roll out the pastry quite thinly then line the base and bring the pastry 3 cm up the sides of the tin to form a pastry case. Line with greaseproof paper and fill with baking beans. Chill for 30 minutes before baking. Preheat oven to 190°C and bake the pastry shell for 20 minutes or until golden brown. Cool completely before filling.

Filling
Lower the oven temperature to 170°C. In a small bowl, combine the egg yolks with the lemon rind. Stir in the condensed milk followed by the juices. Mix thoroughly before pouring the filling into the pastry case. Bake for 30 minutes or until the filling is just set. Allow to cool completely before refrigerating the tart for at least an hour.


Topping
Preheat oven to 200°C. Place the egg whites into the bowl of a stand mixer and best until whites form stiff peaks. Add the caster sugar a tablespoon at a time beating well in between. Beat for a further 5 minutes or until the sugar has completely dissolved. Place the meringue into a piping bag fitted with a 1.5 cm plain tube and pipe decoratively over the filling starting from the pastry edge. Place the tart case on 2 folded tea towels on a baking tray and bake for 10 minutes or until the meringue is lightly coloured. Cool on a rack before returning to the fridge to firm up the filling.


The tart keeps for a few days, stored in an airtight container in the fridge.


I shared the tart with my neighbours and enjoyed the rest of the tart all on my own because I decided the tart was a bit too fragile to transport to work via the gym. Well at least that was my excuse!

See you all again next week with some more baking from my kitchen.

Bye for now,

Jillian
PRINT RECIPE

spring vegetable tart

6 Mar 2017

I just love ricotta cheese. I recently bought a kilogram of it so needed to find ways to use it. I used it to make a pasta sauce; made a cake with it and even made some ricotta gnocchi. Whilst looking through my copy of The Cook and Baker, I saw a recipe for an asparagus, pea, leek and ricotta tart. I needed to buy leeks and asparagus but everything else was either in the fridge or in the cupboard.


Now I made the tart shell using a pastry recipe I've used many times in the past. I started out using the filling recipe in the book but found the proportions didn't work for the tin I used, so I rejigged the recipe and changed the technique a little.


Let's be clear, it might be called a tart but this is a quiche and excellent lunch time fare served warm with a salad.


Here's the recipe for you. For all my recipes, I use a 250 ml cup and a 20 ml tablespoon. All eggs are 60 grams and my oven is a conventional oven not fan forced, so you may need to reduce your oven temperature by 20°C. It's a little time consuming to make but I think it's worth it.


Spring Vegetable Tart - adapted from the asparagus, pea, leek and ricotta tart recipe from the Cook and Baker
Pastry
1 cup (150 gm) plain flour
Pinch each salt and baking powder
60g butter
1 egg yolk
2 tablespoons iced water
Squeeze lemon juice

Filling
20 g butter
1 leek, pale part only thinly sliced
1 bunch asparagus
½ cup frozen peas, defrosted
4 tbls grated parmesan
50 g baby spinach leaves
2 eggs
75 g fresh ricotta cheese, drained
½ cup milk
½ cup cream
½ teaspoon salt
Pinch nutmeg

Pastry
Sift the flour, baking powder and salt into a bowl. Rub the butter in lightly until the mixture resembles breadcrumbs.

Combine the egg yolk, water and a squeeze of lemon and sprinkle over the flour stirring with a knife to form a dough. Add a little extra water if necessary. Knead lightly on a floured board to bring together, then wrap the pastry and chill for 30 minutes or until required.

Roll the pastry out on a lightly floured board to fit a 10 x 34 x 2.5 cm loose based rectangular tart tin. Roll the pastry into the flan tin pressing the pastry well into the flutes leaving a small overhang. Chill the pastry for 30 minutes before trimming the pastry level with the top of the flan ring. Preheat the oven to 180°C. Line the pastry shell with a piece of baking paper and pour in some baking beads or uncooked rice. Blind bake for 20 minutes then remove the paper and baking beads and bake for another 5-10 minutes or until the pastry is dry and golden. Cool a little.

Filling
Preheat the oven to 200°C. Heat a small frying pan over medium heat. Melt the butter and saute the leeks for 3-4 minutes or until softened. Trim the asparagus. Cut the tips and set aside for garnishing and chop the stems into small pieces. Mix together the asparagus, the peas, the cooked leek and 2 tbls of parmesan.

Place the spinach leaves in the base of the tart, nestle the leek and asparagus mixture amongst the spinach. Garnish with the asparagus tips and sprinkle over the remaining parmesan cheese.

In a medium size bowl combine the eggs with the ricotta cheese and mix until smooth. Mix in the milk and cream; add the nutmeg and season to taste. Place the tart shell on an oven tray then pour in as much custard as you can without the mixture spilling over the edge.

Bake at 200°C for 10 minutes before reducing the temperature to 180°C. Bake for another 20-30 minutes or until the filling is set and the top browned.

Serve hot or at room temperature.


When spring vegetables are back in season, I hope you get a chance to make this. 


See you all again soon.

Bye for now,

Jillian
PRINT RECIPE

chocolate salted caramel brownies

13 Feb 2017

Valentines' Day kind of snuck on me this year. I often make brownies for Valentine's Day but what could I do to make them different this year? Whilst looking through my copy of 'The Cook and Baker' I spied a recipe for chocolate salted caramel brownies. The search was over. 


I pinched their idea but used my own chocolate brownie and caramel recipes. This recipe only uses half the caramel but that means leftover salted caramel for the cook and that can't be a bad thing now, can it?


In honour of Valentine's Day I pulled out my heart shaped cookie cutter to make a heart shaped template then sprinkled the brownies with cocoa powder.


Here's the recipe for you. For all my recipes, I use a 250 ml cup and a 20 ml tablespoon. All eggs are 60 grams and my oven is a conventional oven not fan forced, so you may need to reduce your oven temperature by 20°C.


Makes 16 pieces inspired by this recipe from The Cook and Baker by Cherie Bevan and Tass Tauroa

Salted Caramel
1 x 395 g (14 oz) tin condensed milk
30 g (1 oz) butter
45 g (1½ oz) golden syrup
½ tsp vanilla extract
¼ teaspoon sea salt flakes

Brownie
½ cup plain flour
1½ tbs cocoa
125 g unsalted butter, chopped
185 g dark chocolate, chopped
3/4 cup caster sugar
2 eggs, at room temperature
1 teaspoon vanilla extract
pinch salt

Optional
Cocoa powder 

For the salted caramel
Preheat the oven to 180°C (350°F). Line a 10 x 20 cm (4 x 8 inch) loaf tin with baking paper.

Empty the condensed milk into a large microwave safe bowl. Microwave on high for 6 - 8 minutes, stirring every minute until the mixture starts to thicken. Add the butter, golden syrup and vanilla extract and stir well until smooth. Pour the caramel into the lined tray and sprinkle with the sea salt. Bake for 15–20 minutes until golden brown. Leave to cool in the tin, then when cold cut into small squares. You'll only need half the caramel for this recipe

For the brownie

Preheat the oven to 180°C (350°F). Lightly grease and line the base and sides of a 20 x 20 cm (8 x 8 inch) tin with baking paper. Sift the plain flour and cocoa into a small bowl then set to one side.

Melt the butter and chocolate either in a double boiler or in 30 second bursts on high in a microwaveable bowl. Stir until melted and smooth, then set aside to cool a little. Add the sugar, eggs and vanilla then fold in the sifted flour and salt and beat well until smooth. Pour into the prepared tin. Dot evenly with pieces of caramel and bake for 25–30 minutes until just set. Allow to cool completely. When cold cut into 16 pieces using a sharp knife.


If desired decorate with sifted cocoa powder using a heart shaped cookie cutter. 

Happy Valentine's Day.

See you all again next week.

Bye for now,

Jillian
PRINT RECIPE

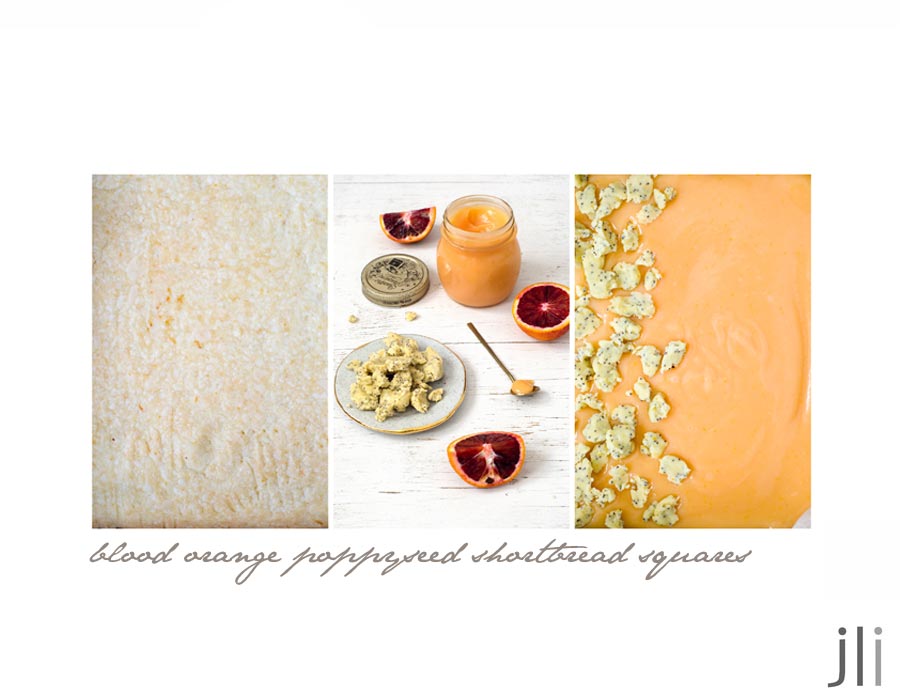
blood orange poppyseed shortbread squares

5 Sept 2016

I just love the taste and the look of blood oranges so whenever they appear in the fruit shop, I buy a few.


When I bought these oranges home from the fruit shop last weekend, I wasn't sure what I'd make. I found a photo of some lemon curd shortbread squares in
'The Cook and Baker' and inspired by the photo, I decided to create my own version.


The base comes from my tart lemon squares recipe and the blood orange and lemon curd I adapted from my regular lemon curd recipe. I've given instructions for making the curd in a bain marie and the microwave but I always make my curd in the microwave these days as it's such a quick and easy method.


Make the curd ahead of time as it needs time to cool and set. You can bake and cool the base before you plan to serve the squares, then put the slice together just before serving. I made the slice using blood orange and lemon curd because blood oranges are in season but you could use any curd you like. Lemon would be great or my favourite, passionfruit and lemon. Then finally, if you don't like poppyseeds, you can leave them out of the crumble topping.


Here's the recipe for you. For all my recipes, I use a 250 ml cup and a 20 ml tablespoon. All eggs are 60 grams and my oven is a conventional gas oven, so if your oven is fan forced, you may need to reduce your oven temperature by 20°C.

Blood Orange Poppyseed Shortbread Squares - makes 16

Blood Orange and Lemon Curd
1 egg and 2 large egg yolks
1 tsp each finely grated blood orange and lemon rind
60ml strained blood orange juice
60ml strained lemon juice
½ cup caster sugar
90g unsalted butter

Method
Place the egg, egg yolks, the rinds, the juice and sugar into a small bowl and place over a pan of simmering water. Whisk the mixture until smooth. Keep whisking for 10 minutes until thickened or when the curd reaches 82°C when tested with a kitchen thermometer. 

If you'd like to make the curd in the microwave, place the egg, egg yolks, the rinds, the juice and sugar into a small microwave proof bowl and microwave on medium high in 1 minute bursts, stirring well at the end of the minute. Keep doing this until the curd thickens or the curd reaches 82°C when tested with a kitchen thermometer. (My curd took 4 minutes to reach this stage but sometimes it can take up to 6 minutes).

Pass the curd through a sieve to remove any eggy bits before adding the butter in small batches until incorporated. Set the curd aside to cool then spoon the curd into a sterilised jar. Store the curd in the fridge where it will last a week.

Pastry
170g (6oz) unsalted butter
½ cup icing sugar
1 tsp grated blood orange rind
1½ cups plain flour
2 tsp poppy seeds
1 tbsp plain flour extra

Method
Grease and line the base and sides of an 8 inch (20 cm) square tin with baking paper. In a food processor, combine the butter, icing sugar and grated orange rind and process until smooth. Add the flour and process until a dough is formed. Take out a little over half the dough and press into the base of the prepared tin. Add the poppy seeds and the additional flour to the remaining dough. Whiz a few times until the poppy seeds are incorporated, then wrap in plastic and place in the fridge. If you don't have a food processor you can make this by creaming the butter and sugar and rind in a bowl before adding the remaining ingredients.


Bake the base at 180°C/350°F (conventional oven) for about 20 minutes or until the base is lightly browned. Place on a wire rack until cool. When the base is cold, spread with all the curd then grate or crumble the reserved pastry over the curd. Return the slice to the oven for a further 20 – 30 minutes or until the crumble is golden brown. Allow to cool completely before cutting into 16 squares.


These went down a treat at work so I can't wait to make them again using another flavoured curd. Next time I might try making a batch of raspberry and lemon curd shortbread squares.

See you all again soon,

Bye for now,

Jillian
PRINT RECIPE
© DELICIOUS BITES • Theme by Maira G.