SLIDER

gluten free brownie bites

30 Nov 2020

What's a brownie bite I hear you ask? Also known as a brookie, it's somewhere between a cookie and a brownie. I used a Liz Prueitt recipe I found on instagram and adapted it a little to use what I had in the cupboard. I didn't have any walnuts so I used toasted hazelnuts instead. I swapped olive oil for the butter to make these dairy free and I also dropped the sugar a little because in general US baked goods are much sweeter than ours. Whilst they were a hit at work, I still found the cookies a little too sweet. The batter was so soft I refrigerated it before scooping out the cookies just before baking. It seemed to work out okay and 10 minutes baking time seemed just right to produce a crinkly top but still soft interior.
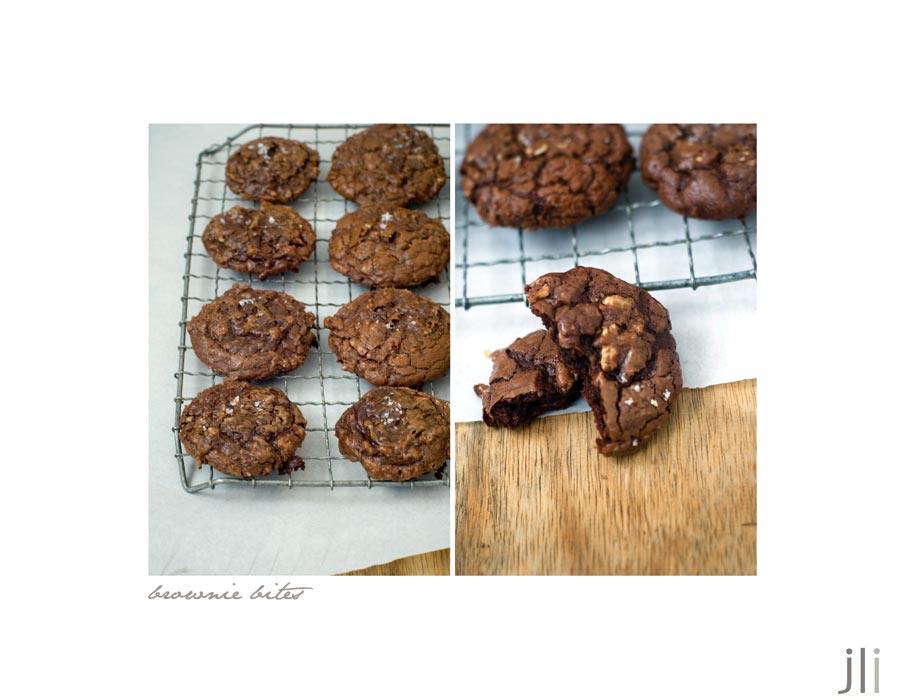
Here's the recipe for you which makes 18-24 small cookies. For all my recipes I use a 250ml cup and a 20 ml tablespoon, unsalted butter and 60g eggs. My oven is a conventional gas oven so if your oven is fan forced you may need to reduce the oven temperature by 20°C. 
 
Gluten free brownie bites, adapted from a Liz Prueitt recipe.
Ingredients  
2 large eggs, at room temperature 
125 g caster sugar
½ tsp vanilla extract 
¼ tsp salt 
30g olive oil 
225 g melted 70% chocolate, cooled 
45g buckwheat flour, sifted 
100g coarsely chopped toasted hazelnuts or pecans, walnuts or macadamias. Sea salt flakes 
 
Method 
Line 2 baking trays with baking paper or silicone sheets and set to one side.
 
In the bowl of a stand mixer with the whisk attached, whisk the eggs, sugar, vanilla and salt for 5 minutes or until light and frothy. Drizzle in the oil a little at a time until incorporated. Using a wooden spoon or spatula, gently fold through the cooled chocolate, followed by the buckwheat flour and the chopped nuts. When mixed you should have a soft dough. Cover then place the bowl in the fridge for 30 minutes to allow the mixture to firm before shaping. 
 
Preheat oven to 190°C, conventional. Using a small scoop or a tablespoon, spoon out small mounds of the mixture leaving room to spread. It’s quite a sticky mixture so I dipped the scoop in a little warm water before shaping each cookie. You should be able to fit 12 cookies onto each tray.
 
Sprinkle the tops of each cookie with a few flakes of sea salt then place in the oven and bake for 5 minutes. Remove the tray from the oven and bang the pan a few times to flatten out the cookies. Rotate the tray and return to the oven for another 5-6 minutes until the cookies are mostly set but the tops are still soft. 
 
Allow the cookies to cool for 10 minutes before removing from the tray and placing on a cooling rack. When cold, store in an airtight container.
 
My workmates love all things chocolate so it was no surprise that the brownie bites were a hit at work. 
 
I hope you all enjoyed your weekends. See you all again next week with some more baking from my kitchen.
 
Bye for now,
 
Jillian
PRINT RECIPE

apple vanilla pound cake

23 Nov 2020

I'd planned on making an apple pie this weekend but lost my pie making mojo and decided to make an apple cake instead. I've become a big fan of Joanne Chang's recipe and found this recipe for an apple vanilla pound cake on her IG live series. It uses an unusual technique, so I wanted to give it a try.
I had everything I needed in my pantry so quickly whipped up the loaf (literally) on Saturday morning.
The cake was easy to make and the batter tasted lovely.
All the cake needed was a light dusting of icing sugar before serving. Here's the recipe for you which makes a small loaf cake. For all my recipes I use a 250ml cup and a 20 ml tablespoon, unsalted butter and 60g eggs. My oven is a conventional gas oven so if your oven is fan forced you may need to reduce the oven temperature by 20°C.


Apple vanilla pound cake - Makes 1 loaf
Ingredients
120 g unsalted butter
½ tsp vanilla bean paste
45 mls cream
½ teaspoon vanilla extract
1 medium granny smith apple, peeled and thinly sliced
1 tsp lemon juice
3 large eggs
¾ cup caster sugar
1¼ cups plain flour, sifted (sift after measuring)
½ teaspoon baking powder
¼ teaspoon salt
1 tablespoon icing sugar, for garnish
 
Method
Heat the oven to 180°C and place a rack in the centre of the oven. Line a small loaf tin with baking paper.
 
In a small pan, melt the butter. Add the vanilla bean paste to the butter. Whisk in the cream and vanilla extract and set aside to let the mixture come to room temperature.

In a small bowl combine the apple slices with the lemon juice and set to one side.
 
In a stand mixer fitted with a whisk attachment, whip together the eggs and sugar until thick and lemony coloured, 4 to 5 minutes on medium high speed. While the eggs and sugar are whipping, sift and stir together the flour, baking powder, and salt. When the egg-sugar mixture is thick, add the dry ingredients and gently fold by hand using a rubber spatula.
 
Spoon a few large spoonfuls of the batter into the butter-cream mixture and stir to combine well. Once the butter-cream mixture is lightened, add it all into the batter and fold until completely combined.
 
Scoop into the prepared loaf pan. Layer the apples across the top in 2-3 rows. Bake in the preheated oven for 50 to 60 minutes until the pound cake is golden brown on top and firm when you press it in the middle. Remove the cake from the oven and let cool.


Sift a bit of icing sugar on top to finish off the cake and slice and serve. Use a very sharp serrated knife to gently slice through the apples. Pound cake may be stored in an airtight container at room temperature for up to 2 days.

I'm planning to remake this using the classic butter creaming method and let you know which method produced the best cake. 

See you all again next week with some more baking from my kitchen. 

Bye for now, Jillian

PRINT RECIPE

brown butter tahini rye chocolate chunk cookie cups

13 Nov 2020

As a fan of both Ottolenghi and Honey & Co, it was only a matter of time before I started using tahini in my baking. I have a very old bottle of tahini that's been sitting in my cupboard for I don't know how long. It had seized a little but after a bit of a whiz with a chopstick it was ready to go. Originally I'd planned on making a Honey & Co white chocolate and tahini cake but then I spied this recipe for brown butter tahini rye cookie cups and I quickly changed my plans.
 
My biscuit jar was empty so I decided to bake a small batch of these cookie cups. The recipe has a very high fat to flour ratio so I was a bit concerned how they would turn out.
On a very gloomy morning I assembled all the ingredients.
I set to work making the cookie dough which tasted delicious but was very, very soft. The dough needs 12 hours in the freezer before baking so I shaped the cookie dough before freezing.
Cookie cups are usually baked in muffin tins but I baked my cookies in a 12 cup Bakemaster macaroon pan from Everten. I think the mixture is too soft to make regular cookies though as they'd spread all over the place. To make regular cookies, I'd either add a bit more flour to the dough or I'd reduce the butter and tahini quantity a little.
Here’s the recipe for you which makes 12 cookie cups. These are best served warm and as they are baked using cookie dough straight from the freezer, just bake them when you need them. For all my recipes I use a 250 ml cup, a 20 ml tablespoon, unsalted butter and 60 g eggs. My oven is a conventional oven so if you have a fan-forced oven you may need to reduce the temperature by 20ºC.
 
Brown butter tahini rye cookie cups – makes 12
Ingredients 
113 g unsalted butter at room temperature
1/4 cup caster sugar
1/4 cup brown sugar
1 tsp vanilla extract
100g tahini
1 large egg
¾ cup plain flour
¼ cup rye flour
¼ tsp bicarb soda
¼ tsp baking powder
pinch salt
 
140 g dark chocolate pieces, I used 52% cocoa (reserve 12 large pieces) 
Sea salt flakes

Method
In a covered microwave safe bowl, cook the butter on high for 5-6 minutes or until the butter smells very nutty and the milk solids turn golden brown. Refrigerate the bowl until the butter begins to solidify. Weigh the browned butter; it should be about 90g. If you have less, add enough room temperature unsalted butter to get there. 
 
In the bowl of a stand mixer, cream the browned butter and the sugars together with the vanilla until pale and fluffy. Add the tahini and egg and continue mixing on medium speed for another 2 minutes, scraping down the sides every so often to be sure everything is incorporated.
 
Combine the plain flour, rye flour, bicarb soda, baking powder and salt in a large bowl. Add to the mixer and combine on low until just combined. Add the chocolate pieces and mix them in by hand with a rubber spatula.
 
Line a baking sheet with baking paper. Scoop out 12 dough balls and place them on the baking sheet. Top each cookie dough ball with a large piece of chocolate. Wrap the baking sheet with plastic wrap and place it in the freezer for at least 12 hours. This will allow the glutens in the flour to relax and will give you a tender soft cookie. Do not skip this step. The cookie dough will keep in a ziplock bag in the freezer for up to 6 months. Bake them off as needed!
Pre-heat the oven to 170˚C conventional. Place a cookie dough ball into each cup of a greased non-stick macaroon tray or muffin tin then sprinkle each cookie cup with a few salt flakes. Bake for 15-17 minutes until just golden brown around the edges. They will still look fairly unbaked in the middle. Cool for at least 20 minutes before using a small offset spatula (or butter knife) to transfer the cookie cups to a cooling rack.

Bake these to order as these are at their best still warm from the oven. Otherwise a 10-15 second zap in the microwave will do the trick. The tahini rye cookie cups are very tasty, an intriguing blend of sweet and salty with some savoury notes from the tahini. Definitely worth making again.

See you all again next week with some more baking from my kitchen. 

Bye for now,

Jillian

PRINT RECIPE

pumpkin spice cupcakes

9 Nov 2020

You can tell Thanksgiving is around the corner when instagram is flooded with all things pumpkin. How could I not add my own pumpkin flavoured cupcakes to the mix?

Originally this was going to be pumpkin bread but when I walked past the shelves and spied the friand tin, I decided to turn the pumpkin bread into cupcakes.

The cake mixture itself is very tasty but the cream cheese icing with pecans atop, make these little cakes into very tasty treats. I shared these with my neighbours and workmates and when one asked for the recipe, you know you have a hit on your hands.


Here’s the recipe for you which makes 9 friands or 12 cupcakes. For all my recipes I use a 250ml cup and a 20 ml tablespoon, unsalted butter and 60g eggs. My oven is a conventional gas oven so if your oven is fan forced you may need to reduce the oven temperature by 20°C.

Pumpkin Spice Cupcakes with cream cheese icing - inspired by the Flour Bakery Famous Banana Cake recipe
Cake 
¾ cup plain flour 
½ teaspoon baking powder 
¼ tsp bicarb soda 
½ tsp ground cinnamon 
¼ tsp ground ginger 
pinch nutmeg 
pinch cloves 
pinch sea salt 
¼ cup brown sugar 
¼ cup caster sugar 
1 egg 
¼ cup canola oil 
200 gm pumpkin puree
1 tbs yoghurt 
1 tsp vanilla 

Icing 
30 gms unsalted butter, softened 
60 gms Philadelphia cream cheese, softened 
½ tsp vanilla extract 
1 cup sifted icing sugar 
Whole pecans to decorate (mine were maple glazed)  

Glazed Pecans 
12 pecan halves 
¼ cup maple syrup or maple flavoured syrup 
Pinch of sea salt

Method 
Position the rack in the centre of the oven and preheat to 180°C. Butter 12 cup muffin pan or line with paper liners. I used a friand pan. 

In a bowl, sift together the flour, bicarb soda, spices and salt. Set aside. Using a stand mixer fitted with the whip attachment, or a handheld mixer, beat together the sugar and egg on medium speed for about 5 minutes or until light and fluffy. With the machine on low speed, slowly drizzle in the oil. Do not pour the oil in all at once. Add it slowly so it has time to incorporate into the egg mixture and doesn't deflate the air you have just beaten into the batter. Adding the oil should take about 1 minute. Add the pumpkin, the yoghurt and vanilla, then continue to mix on low speed just until combined. Using a rubber spatula, fold in the flour mixture until thoroughly combined. No flour streaks should be visible.

Carefully spoon the batter into each muffin or friand tin. Fill each tin about 2/3 full. Bake for 20 minutes or until risen and golden and tests cooked when a skewer is inserted. Let cool on a rack for 10 minutes before removing from the tin. Ice when completely cold.

Pecans
Preheat oven to 180°C/350°F (conventional). Toss pecans in maple syrup then spread out in a single layer on a baking paper lined baking tray. Sprinkle the pecans with a few flakes of sea salt. Bake until maple syrup is caramelized and pecans are toasted about 10 minutes. Normally I check the pecans after 5 minutes, and then turn them over. Remember the maple syrup is hot so use tongs or a fork for this step. Let cool completely on baking sheet before storing the pecans in an airtight container.

Icing 
While the cupcakes are cooling, blend the cream cheese, butter, vanilla and icing sugar in a food processor until smooth or you can do this using hand beaters. Refrigerate the filling for an hour to allow it to firm. Top each cupcake with a generous dollop of icing before topping with a pecan. Store in a sealed container in the fridge but bring to room temperature before serving.

Like the rest of the world I was on tenterhooks all weekend awaiting the outcome of the US election. 

See you all again next week with some more baking from my kitchen. 

Bye for now,

Jillian

PRINT RECIPE

devil's food cake with chocolate cream cheese icing

1 Nov 2020

It's a very long time since I last made a Devils Food Cake. I think I was stil a teenager. With my favourite twin girls about to have their first birthday, I decided to make a 3 layer Devil's Food Cake to celebrate their birthday using Claire Ptak's recipe as my base.

Claire's devils' food cake is a simple one bowl recipe which makes a very light and moist cake. I had a secret weapon though, some ridiculously dark and rich chocolate cream cheese icing which would elevate a slice of bread to gourmet status.
The cake is best made the day before serving and refrigerated to firm the cake before icing. The icing makes a generous amount so you could completely coat the cake or do some piping if you wished.

Here's the recipe for you, which makes a 17 cm cake or a three layer 16 cm cake. For all my recipes I use a 250 ml cup, a 20 ml tablespoon, unsalted butter and 60g eggs. My oven is a conventional oven so if you have a fan-forced oven you may need to reduce the temperature by 20ºC.


Cake
110g plain flour
50g cocoa powder
½ tsp fine sea salt
1 tsp bicarbonate of soda
½ tsp baking powder
225g (1 cup) caster sugar
1 egg
1 tsp vanilla extract
100g buttermilk or plain yoghurt
50g vegetable oil
112g hot water


Chocolate Cream Cheese Icing 100g unsalted butter, at room temperature 250g cream cheese, at room temperature 100g icing sugar, sifted 50g Dutch-process cocoa powder, sifted Optional – chocolate curls for decoration

Cake Method 

Preheat the oven to 170°C, conventional. Butter and line a 17cm cake tin or three 16cm sandwich tins with baking paper. I also dusted the tins with some cocoa.

Measure the dry ingredients, including the caster sugar, into a large mixing bowl and whisk with a balloon whisk to distribute the salt, bicarbonate of soda and baking powder evenly throughout the other dry ingredients.

In a large jug, whisk together the wet ingredients (except for the hot water). Once they are well mixed together, slowly whisk in the hot water.

Make a well in the centre of the dry ingredients and pour in half of the wet mixture. Starting in the middle of the bowl, whisk in a clockwise, circular motion. Resist the temptation to switch direction or you’ll end up with lumps of dry ingredients. Gradually add the remaining wet ingredients until you have a smooth, liquid batter.

Pour the batter into the tin (s) right away and bake for 25 minutes for the sandwich cakes or 40 minutes for the larger cake or until the top is springy to the touch and an inserted skewer comes out clean.

Remove the cake from its tin by running a small paring knife along the inside of the tin to release the cake. Allow to cool completely before turning out. Be careful with this step as the cake is quite delicate.

If you made the larger cake, using a serrated bread knife (the longest one you have), score a horizontal line half of the way up the side of the cake and then slowly cut the cake into three layers.

Chocolate cream cheese icing 

Place the butter, the cream cheese and the vanilla extract in the bowl of a stand mixer fitted with the whisk attachment and beat until pale and creamy. Scrape down the side of the bowl, add the icing sugar and cocoa, and mix until just combined. 


To assemble 
Place one cake layer onto a serving plate. Spread a third of the icing over the cake, then top with the second cake layer. Spread another third of the icing over the second layer then spread the remaining icing over the top of the cake. If you like you can make a naked version of the cake by piping an extra cm of icing over the exterior of each layer of icing then smoothing the extra icing evenly around the outside of the cake. Place in the fridge and chill for at least 2 hours or overnight. Bring to room temperature before serving.

As this was a birthday cake, I couldn't cut into it to show you the layers but they looked good. The adults really enjoyed the cake. One twin thought the cake sans icing was pretty good. The other twin was more interested in smooshing her piece to smithereens. 

See you all again next week with some more baking from my kitchen. 

Bye for now, 

Jillian

PRINT RECIPE
© DELICIOUS BITES • Theme by Maira G.