SLIDER

claire ptak marble cake

28 Aug 2023

Hi all, I've have been travelling all over the place the past 10 days or so. I've just been to Dungog and back to see my brother and his new puppies, hence the delay in posting today's recipe.


I whipped this cake up just before I drove to Dungog and photographed it whilst up there. The icing was a little damaged en route which you might be able to notice in one of the photos.


The recipe comes from Claire's Ptaks new book, Love is a Pink Cake. It's a simple buttery vanilla and chocolate marble cake topped with a delicious white chocolate glaze, which in my opinion makes the cake. 


Here's the recipe for you which is adapted from Claire Ptak's cookbook, Love is a Pink Cake, which makes an 8 x 4 inch loaf cake. For all my recipes I use a 250ml cup and a 20 ml tablespoon, unsalted butter and 60g eggs. My oven is a conventional gas oven so if your oven is fan forced you may need to reduce the oven temperature by 20°C.


Claire Ptak Marble Cake 
Ingredients
175g unsalted butter, very soft, plus extra for greasing 
175g caster sugar
2 eggs
1½ tsp vanilla extract
175g plain flour 
1 tsp baking powder 
1/2 tsp fine sea salt
⅓ cup buttermilk 
50g cocoa powder 
80g boiling water 

Icing
120g icing sugar 
1½ tbs hot water
60g white chocolate, melted and cooled

Method
Preheat the oven to 190°C conventional and grease and line a small loaf tin, about 8 x4 in, with baking paper. Make sure the paper comes up the sides of the tin.

Put the butter and sugar into the bowl of a stand mixer and cream together well, but not as fluffy as you would for a layer cake. Beat in the eggs, one at a time, mixing well after each addition. Mix in the vanilla.

Whisk the flour, baking powder and salt  together in a large bowl. Mix in half of this flour mixture, scraping down the sides as you go, until barely combined. Keep the mixer going while you add the buttermilk. Add the remaining flour and mix until just combined, then scrape down the bowl and give it one last mix.
Spoon one third of the mixture into a bowl and set aside. Whisk together the cocoa powder and boiled water until smooth. Allow the mixture to cool a little then stir it into the reserved cake mixture until it's incorporated.

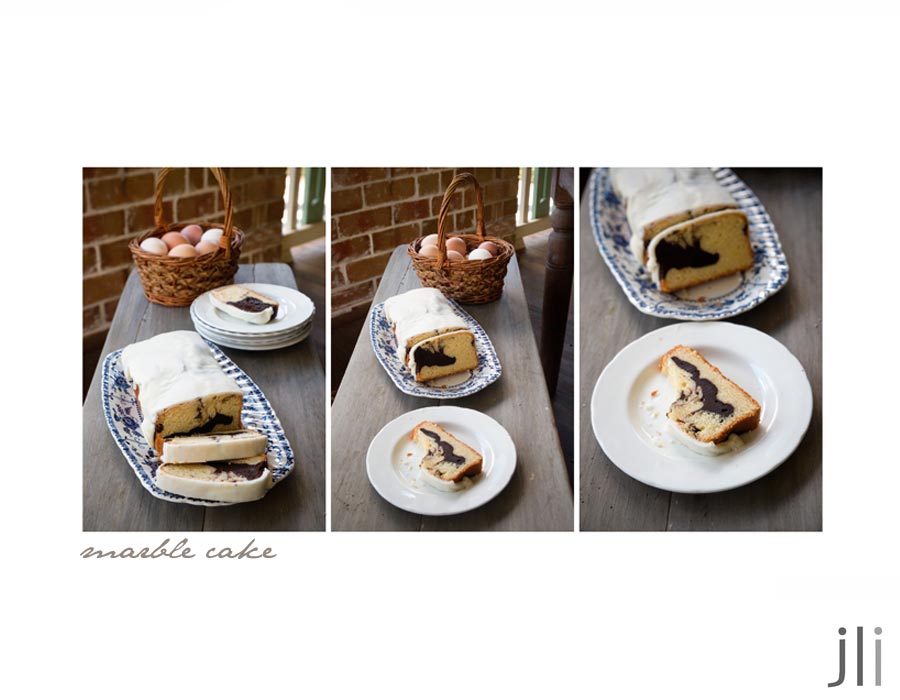
Spoon a third of the plain mixture into the base of the prepared tin, then alternate dollops of chocolate mixture and plain mixture to look like a checkerboard. Run a knife through the batters in a swirling motion to create a marble effect. Less is more here, so resist the temptation to over-swirl.


Bake in the oven for 50-60 minutes, or until springy and a skewer inserted comes out clean. Leave to cool in the tin completely before icing.


To make the icing, place the sifted icing sugar, hot water and cooled melted white chocolate in a small bowl and whisk together until smooth. Remove the loaf from the tin by running a small knife around the sides of the tin, then tilting the tin on its side and coaxing the loaf out, using the baking paper as a handle. Remove the paper and turn the loaf upright on your wire rack. Drizzle over the icing and let it drip down the sides, then carefully transfer to a serving dish.
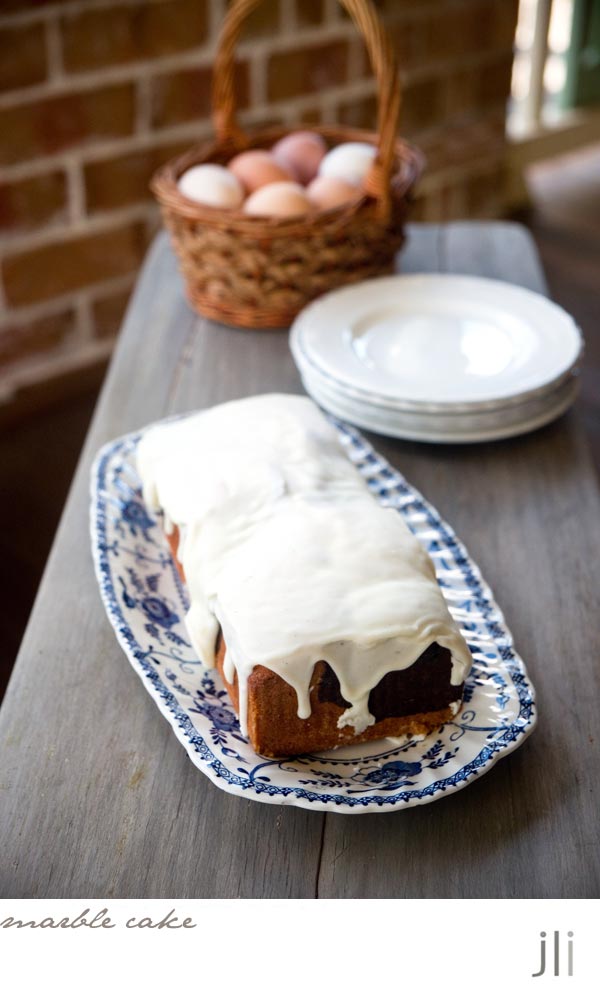

My cake barely rose and I'm not sure if that's the way the cake should be but I suspect my baking powder might have passed it's use by date. I'm going to whip up another one for my neighbours with fresh baking powder and see what happens. It was delicious anyway, barely risen or not.


See you all again some time next week with, fingers crossed, some travel photos. I have a new laptop and all new editing software, which I'm hoping I'll learn to use in the next few days. Wish me luck.

Bye for now,

Jillian

PRINT RECIPE

pistachio and lime syrup cake

16 Aug 2023


I love cookbooks but I ran out of shelf space long ago. Last year I realised I could borrow cookbooks from the library and scan the recipes that appealled to me, before returning the book for someone else to enjoy.


That's how I came upon this recipe from Belinda Jeffery which I found in her latest book, 'In Belinda’s Kitchen – Essential Recipes'. As I'm going away soon, I wanted to use pantry staples and items already in my fridge, like the 4 limes I found lurking in the vegetable drawer, so this pistachio and lime syrup cake fitted the brief. 


Belinda writes foolproof recipes, so I knew this cake would turn out perfectly as long as I followed her instructions although I did deviate from the recipe a little. As I had to pull out the food processor to grind the pistachios, I decided to make the cake batter in there as well and it turned out just fine. Instead of using pomegranate seeds, I used dried rose petals which were already in the cupboard and of course I halved the recipe to suit my small tin.


Here's the recipe for you which makes a 17cm cake. If you'd like to make a larger cake, the original recipe can be found hereFor all my recipes I use a 250ml cup and a 20 ml tablespoon, unsalted butter and 60g eggs. My oven is a conventional gas oven so if your oven is fan forced you may need to reduce the oven temperature by 20°C.


Pistachio and lime syrup cake - makes a 17cm cake
Ingredients
30g plain flour
½ tsp baking powder
50g pistachios, finely ground
1½ tbs finely grated zest, approximately 2 large limes 
60g almond meal 
125g unsalted butter, at room temperature
110g caster sugar
2 × 60g eggs, at room temperature
1 tbs dried rose petals to decorate, optional
rich cream or thick Greek-style yoghurt, to serve

Syrup and topping
45g caster sugar
¼ cup (60ml) fresh lime juice (from about 2 large limes), strained 
45g pistachios, roughly chopped

Method
Preheat your oven to 170°C, conventional. Butter a 17cm round cake tin, line the base with buttered baking paper then dust the tin with flour. 

Tip the flour, baking powder, ground pistachios, lime zest and almond meal into a medium-sized bowl. Whisk them together with a balloon whisk for a minute or so, then set the bowl aside. 


Put the butter and sugar into the bowl of an electric mixer (or use a hand-held electric beater) and beat them on medium speed for about 4 minutes, stopping and scraping down the sides occasionally, until the mixture looks creamy. Beat in the eggs, one at a time, allowing each egg to be absorbed before adding the next. (Don’t worry if the mixture looks a little curdled after adding the last egg – it will come together again when you add the dry ingredients.) Tip in the flour mixture and mix everything together on low speed until it is just combined – be careful not to over-mix it, or the cake may be a bit tough. Scrape the batter into the prepared tin and smooth the top. 

Bake the cake for 45–50 minutes, or until it springs back when lightly pressed in the centre and a fine skewer inserted in the middle comes out clean. Transfer it to a wire rack and leave it to cool a little in the tin.


When the cake is lukewarm, make the syrup. To do this, put the sugar and lime juice into a small saucepan over low heat and stir until the sugar dissolves. Add the chopped pistachios, increase the heat and bring the mixture to the boil. Turn the cake out onto a serving plate and peel away the baking paper. Slowly spoon the hot pistachio and lime syrup evenly over the top, then leave the cake to cool completely. 


Just before serving, scatter the cake with dried rose petals, if using. Serve with softly whipped cream or yoghurt. 


I love pistachios, so I knew I would love this cake, and the addition of the lime syrup makes for one zesty cake.


I shared the cake with my neighbours and they loved it as well.

See you all again next week with some more baking from my kitchen.

Bye for now,

Jillian
PRINT RECIPE

lemon and labne celebration cake

14 Aug 2023


As soon as I saw 
Verena Lochmuller make this cake on the Ottolenghi youtube site, I knew I had to make it, I just needed a reason to do so. To quote Verena, this is 
a beast of a cake and it has many, many steps so the recipe is long. I actually started the process back in May, when I made a batch of lemon and vanilla bean marmalade which is used in the filling. . 


Many of the elements can be bought but I decided to make the dehydrated lemon slices when I saw the price of a small packet at David Jones. 


After burning the lemon rind, preparing the labne and the browned butter, I ran out of puff and purchased a box of mini meringues to decorate the cake instead of making them. I also purchased a spice grinder to deal with the burnt lemon peel and a lazy Susan to decorate the cake, making this one expensive 17cm layer cake!


If you'd like to make this beast of a cake, here's the recipe for you which is also available on the Ottolenghi 
websiteFor all my recipes I use a 250ml cup and a 20 ml tablespoon, unsalted butter and 60g eggs. My oven is a conventional gas oven so if your oven is fan forced you may need to reduce the oven temperature by 20°C.


Lemon and labne celebration cake – makes a 17cm layer cake
Lemon cake
145g unsalted butter, cut into pieces
190g caster sugar
190g plain flour, or cake flour
3 tsp baking powder (12g)
1/4 tsp salt
3 eggs + 1 yolk (200g)
75g vegetable oil, or other neutral oil like sunflower
75ml whole milk
2 tsp vanilla bean paste or extract
3 tsp lemon zest 

Lemon syrup
75ml lemon juice 
55g caster sugar

Labneh mascarpone icing
250g mascarpone
165g cream cheese
80g labneh, store-bought or homemade
1 tsp vanilla bean paste or extract
1 tsp lemon juice
175g icing sugar

For assembly
100g lemon marmalade, or regular marmalade mixed with a tablespoon of lemon juice
Meringue kisses, store-bought or homemade
Dehydrated lemons
Burnt lemon powder 

Cake
Grease and line the base and sides of three, 17cm cake tins that have a removable base (springform cake tins will also work with baking paper). You can also do this with 2 tins, saving a third of the batter to bake again once one of the cakes has cooled. We wouldn’t recommend doing this 3 times with 1 tin though, as the butter in the batter might start to solidify by the third go.

Melt the butter in a medium saucepan over a medium-high heat until it begins to bubble. Turn the heat down to medium and cook, whisking occasionally to prevent it from burning. It should start to foam, at which point it’s almost ready: keep whisking until browned and smelling nutty. Immediately pour into a heat proof bowl to stop it cooking further (you should have about 110g). Set aside to cool. You want it still liquid, so if it does solidify then melt it very gently once more and let cool slightly.

Preheat the oven to 180°C conventional. In a large bowl whisk together the sugar, flour, baking powder and salt until combined and there are no lumps.

In a separate large bowl, whisk together the eggs, oil, milk and vanilla until smooth. Pour this into the flour bowl and use a whisk and a folding motion to gently incorporate the wet ingredients into the dry. Once the batter is smooth and there are no lumps, pour in the cooled melted butter and the lemon zest and whisk just to combine (don’t over mix). Divide the batter evenly between the 3 cake tins, or alternatively add a third of the batter to each of the two tins (and reserve a third for a second bake). Bake for 22-25 minutes, or until a skewer inserted into the centre comes out clean.

While the cakes are in the oven, make the lemon syrup by adding the lemon and sugar to a small saucepan and placing over a high heat. Stir gently to dissolve the sugar then remove from the heat.

Brush the tops of the still warm cakes with the warm lemon syrup (about 40ml per cake) then set aside to cool completely. If baking a third cake, set aside to cool for at least 20 minutes before gently releasing the cake from its tin. Repeat with the remaining batter so you have a total of 3 cakes.

While the cakes are cooling, make the mascarpone cream by adding all the ingredients to a stand mixer, fitted with the whisk attachment, and beat on medium speed until smooth and you have soft to medium peaks, scraping the sides of the bowl as needed. Be sure to keep an eye on this, as you don’t want to over-whip the icing.


When ready to assemble, place one of the cooled cakes on a cake stand. Using an off-set spatula or a palette knife, spread a little less than a third of the icing over the top of the cake. Evenly spoon over half the marmalade then crush a couple mini meringues with your hands and sprinkle this on top. Lastly, if using, sprinkle very lightly with some of the burnt lemon powder. Carefully place another cake on top. Repeat this process again before carefully topping with the last cake layer. Now spread the remaining icing on the top of the cake. Don’t worry about it being perfect, you can cover this up with the decorations! If getting ahead, refrigerate the cake at this point before decorating the top.


To decorate the cake, artfully arrange some of the meringue kisses on top along with the dehydrated lemons and a small sprinkling of the burnt lemon powder. Cut into thin slivers and serve.


Meringue kisses (makes over 100 kisses)
120g egg whites
1⁄2 tsp cream of tartar
240g caster sugar
3⁄4 tsp cornflour
1/8 tsp baking powder

Method
Preheat the oven to 110°C conventional. Line 2-3 large trays with baking paper.

Place the egg whites into a stand mixer, with the whisk attachment in place, and beat on medium-high speed until frothy. Add the cream of tartar and whisk until the mixture begins to stiffen slightly and the bubbles tighten. Meanwhile, combine the sugar, cornflour and baking powder in a medium bowl. When ready, and with the mixer on medium-high speed, use a dinner spoon to add in the sugar mixture a spoonful at a time, whisking until glossy and you have medium to stiff peaks.

Transfer the meringue mixture into a piping bag fitted with a 13mm round nozzle (or a star shaped nozzle) and pipe small kisses, spaced a couple centimetres apart, onto the prepared trays. Bake for 90 minutes, or until nicely dried out, but not at all coloured. Set aside to cool completely. Store in an air-tight container for up to 2-3 weeks.

Dehydrated lemon slices
1 lemon, sliced into thin 1⁄4 cm rounds, pips removed

Method
Preheat the oven to 100°C conventional. Place the rounds onto a large, parchment-lined baking tray, arranging them so they’re not overlapping. Dehydrate in the oven for 3 hours, or until visibly dried and no longer carrying any moisture. Leave to cool completely then store in an airtight container. Dehydrated lemons can last for a very long time (years!) if stored correctly, as long as they’re completely void of any moisture as even the smallest amount will cause them to spoil with time.

Burnt lemon powder
1 lemon

Method
Preheat the oven to 240°C, conventional. Use a vegetable peeler or a small, sharp knife to remove the skin from the lemons, avoiding any pith. Place onto a small tray and bake on the top shelf of your oven for 15-20 minutes, or until very fragrant and completely charred and blackened. Set aside to cool then use a spice grinder or a small food processor to blitz into a fine powder. If using the latter, pass the powder through a sieve set over a bowl, to remove any larger pieces. Store in a jar in your cupboard and use to top sweet icings or creamy labneh.

This was an absolute hit with every-one who managed to snaffle a slice. I'm going to make a version of this cake again later in the year when the twinnies turn 4, however I'm planning to simplify the process a little - fewer layers, less complicated filling.

As this is a celebration cake, there has to be a reason to celebrate. I brought the cake into work to celebrate my last few days at work before taking 3 months leave. I'm taking time off to spend time with family and to go on a long overdue, much delayed holiday.

Meanwhile, I'll be back again next week with some more baking from my kitchen and there will be weekly baking posts until I head overseas in September.

See you all again soon.

Bye for now,

Jillian
.
PRINT RECIPE

baked rhubarb and orange cheesecake

3 Aug 2023


Last month, I bought a bunch of rhubarb and I had so many recipe ideas I ended up being overwhelmed. I used half the bunch to make
this rhubarb custard crumble cake, then the leftover rhubarb stayed in my fridge unused for many weeks. I eventually located the recipe for a baked rhubarb and orange cheesecake that I'd forgotten to bookmark, bought the ingredients then set to work making it.


I made a whole bunch of changes to the recipe. I've been oven roasting rhubarb for years so I used my own method plus I reduced the amount of sugar substantially. I don't like biscuit bases so I used a shortbread base and tweaked the filling a little. Making the cheesecake involved a lot of steps, so I oven roasted the rhubarb and made the base on Friday night, baked the cheesecake on Saturday, then cooled it overnight before serving the cheesecake on Sunday.


Here's the recipe for you which makes a 17cm cake. Please note you'll need to start this recipe at least a day before serving to allow the cheesecake to cool and set. For all my recipes I use a 250ml cup and a 20 ml tablespoon, unsalted butter and 60g eggs. My oven is a conventional gas oven so if your oven is fan forced you may need to reduce the oven temperature by 20°C.


Baked rhubarb and orange cheesecake
Oven Roasted Rhubarb
1 bunch rhubarb, stalks washed and trimmed
60-75g caster sugar
1 orange

Base
55 grams unsalted butter
2 tbs caster sugar
½ teaspoon vanilla essence
½ cup (75g) plain flour
Pinch salt

Filling
450g full-fat cream cheese
125g caster sugar, plus 1 tbsp
1 tbs plain flour
Pinch of salt
Grated zest of 1 small orange
2 eggs
220g sour cream
1 tsp lemon juice

Oven roasted rhubarb
Preheat the oven to 200°C conventional. Cut the rhubarb stalks into 5cm lengths and place into a baking dish. Peel 3 wide strips of zest from the orange and cut them into fine slivers and scatter over the rhubarb. Grate the remaining rind and reserve for the filling.

Halve and juice the orange. Sprinkle the rhubarb with 60g of sugar and drizzle with the orange juice. Cover the dish with foil or a lid and bake for 10-15 minutes or until the rhubarb is cooked but still holds its shape. Remove the dish from the oven and allow the rhubarb to cool. Check for sweetness and add more sugar if needed. Carefully lift the rhubarb pieces out with a fish slice and store in an airtight container in the fridge, reserving the juice. Add the juices from cooled rhubarb to a small pan and simmer for 5-6 minutes over a medium heat until slightly reduced and syrupy. Leave to cool, then pour into a small jug and chill until serving time.

Cheesecake
Meanwhile, remove the cream cheese from the fridge and let it come to room temperature. Lightly grease and flour the sides of a 17 cm springform cake tin and line the base with baking paper. Preheat the oven to 170°C, conventional.

Cream the butter, sugar and vanilla together in a small bowl until light and creamy. Mix in the flour and salt and combine until the mixture forms a soft dough. You can also make the dough in a food processor.

Press the mixture into the base of the spring-form tin, bringing it slightly up the sides. Bake in a preheated oven for 15-20 minutes or until lightly golden. Remove from the oven and allow to cool on a rack while you prepare the filling.

Increase the oven temperature to 240°C, conventional. Place the cream cheese into a large mixing bowl and beat with a hand-held electric mixer for 2 minutes until smooth and creamy. Beat in the 125g caster sugar, flour, salt and the reserved orange rind, adding the eggs, one at a time. Stir in 100g sour cream.

Pour the cheesecake mixture into the tin, bake for 10 minutes, then lower the temperature to 110°C conventional and bake for a further 30-35 minutes until just set but still quite wobbly in the centre. Turn off the oven, open the door slightly and leave the cheesecake inside to cool for 1 hour.

Remove the cheesecake and preheat the oven to 150°C, conventional. Mix the rest of the sour cream with the remaining 1 tbsp sugar and the lemon juice. Arrange some of the drained rhubarb in a single layer over the top of the cheesecake. Spread the sour cream mixture over the top of the rhubarb, then return the cheesecake to the oven for 20 minutes. Remove and leave to cool once more, then cover loosely and chill for at least 8 hours or overnight.


To serve, run a round-bladed knife around the sides of the tin to release the cheesecake, then carefully remove it from the tin. Drizzle over a little of the syrup, then serve cut into wedges with the remaining rhubarb and a little of the syrup spooned around.


The verdict? Absolutely delicious. Tangy rhubarb topping, softly set cheesecake on a crunchy base. I think the cheesecake by itself would be delightful and one day I'll give that a go.


See you all again next week with some more baking from my kitchen.

Bye for now,

Jillian


PRINT RECIPE
© DELICIOUS BITES • Theme by Maira G.