SLIDER

australian womens weekly
Showing posts with label australian womens weekly. Show all posts

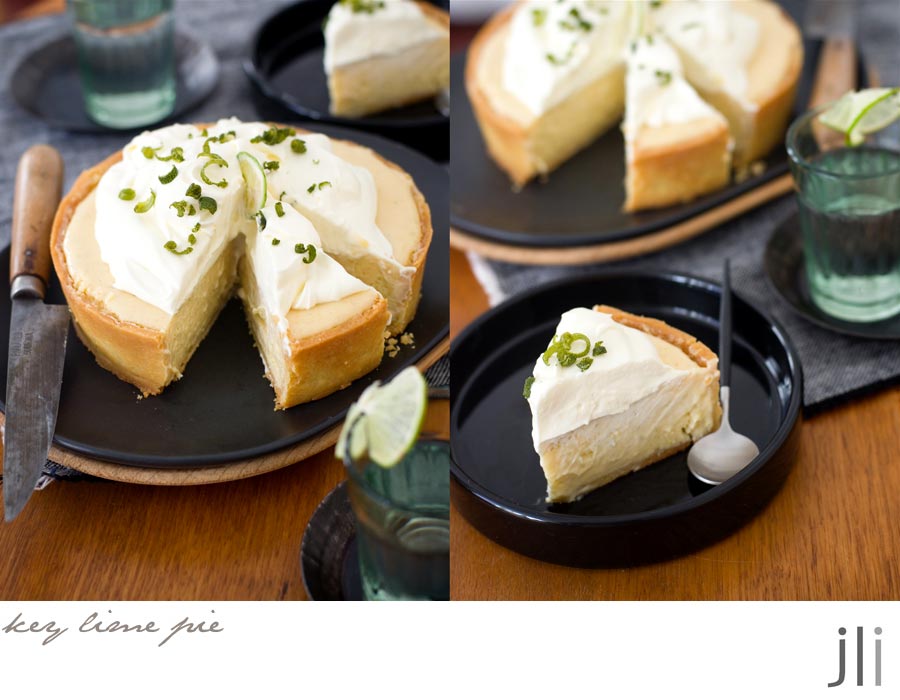
key lime pie

13 Feb 2023
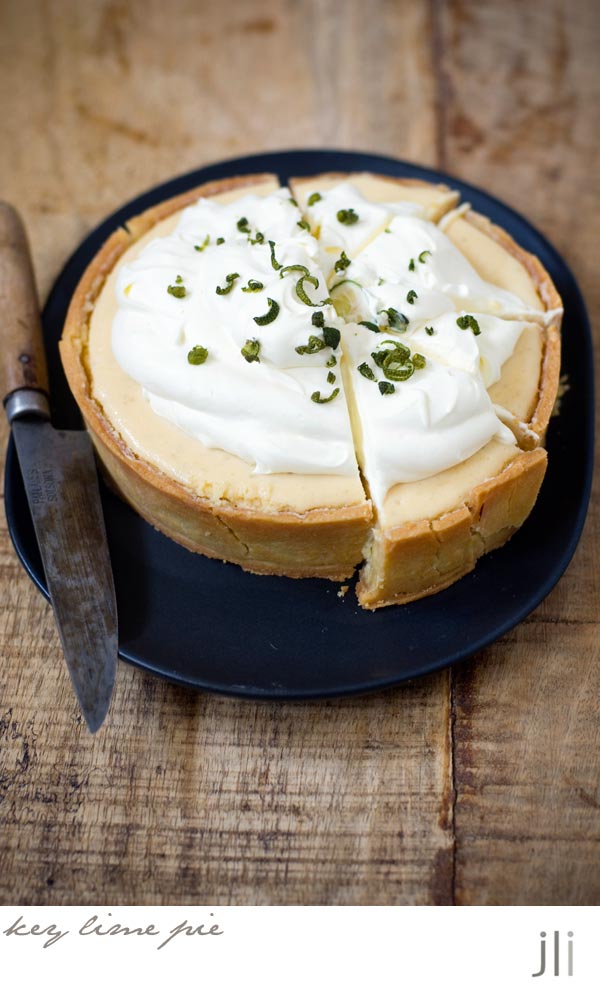
My freezer is full to bursting at the moment. Whilst rifling through the freezer looking for some ricotta gnocchi, I found a packet of almond short crust pastry I'd completely forgotten about. As I haven't baked a pie in ages, I decided to make one. I
 defrosted the pastry; parbaked a tart shell then scratched my head wondering what kind of filling to make. I looked through the fruit and vegetable drawer and found a bag of limes, so the decision was made for me, I was going to make a key lime pie. 


Have you eaten key lime pie, because I haven't, and I've certainly not made one. I did some digging online and found most recipes were pretty much the same - a biscuit crumb crust and a lime custard filling made with sweetened condensed milk, egg yolks and lime juice +/- grated lime rind then served with whipped cream to offset the sweetness of the filling.


As I'd already made the pastry shell I wasn't going to make a crumb crust, so I just made the filling. I based my filling on an Australian Women's Weekly recipe but I used one fewer egg yolk. I also used one beaten egg white to seal the pastry before filling.

Here's the recipe for you which makes a 4cm deep 17cm tart. The filling quantity is enough for a regular 9-inch tart. For all my recipes I use a 250ml cup and a 20 ml tablespoon, unsalted butter and 60g eggs. My oven is a conventional gas oven so if your oven is fan forced you may need to reduce the oven temperature by 20°C.


Key lime pie
Almond short crust pastry
110 g (4 oz) cold unsalted butter, diced
¼ cup icing sugar (confectioner’s sugar)
¼ cup (25g) almond meal
1⅓ cups (200g) plain flour
1 egg, lightly beaten
Cold water

Filling
3 egg yolks
1 tablespoon finely grated lime rind
400 gram can condensed milk
½ cup fresh lime juice

Topping
300 mls thickened cream, whipped
Lime zest

Pastry
To make the pastry, combine all the dry ingredients in a food processor, and whiz for a few seconds until well combined and free of lumps. Add the cold butter and whiz until the mixture resembles breadcrumbs. Add the egg and sufficient cold water and whiz until a soft dough just starts to form around the blade. Remove the dough from the food processor and gather the pastry into a ball; flatten slightly before wrapping in plastic and placing in the fridge. Refrigerate the pastry for 30 minutes. You’ll only need about half of the pastry dough for this recipe. The pastry freezes well so just wrap the remaining pastry in plastic wrap and store in the freezer.

Grease a deep 17cm tin. Roll out the pastry quite thinly then line the base and sides of the tin to form a pastry case. Line with greaseproof paper and fill with baking beans. Chill for 30 minutes before baking. Preheat oven to 180°C and bake the pastry shell for 20-30 minutes or until golden brown. If you like, you can seal the tart shell with egg white and return to the switched off oven for a few minutes until dry. Cool completely before filling.

Filling
Lower the oven temperature to 170°C, conventional. Place the egg yolks and the grated lime rind in the bowl of a stand mixer and whisk on high speed for about 4 minutes until the mixture lightens in colour and thickens somewhat. Stir in the sweetened condensed milk, mixing until smooth then beat at high speed for 3 minutes. The filling will become slightly thicker and gain a bit of volume. Add the lime juice, stirring just to combine then pour the filling into the tart shell and return the tart (on the baking sheet) to the oven. 


Bake the tart for 15 to 20 minutes, until it appears set around the edges though still a bit wobbly in the centre. Remove the tart from the oven and cool to room temperature then refrigerate for several hours before serving. Just before serving, decorate with the whipped cream and lime zest. If you refrigerate the cream topped pie for an hour or so before serving, you'll find the pie much easier to slice.


All in all, the key lime pie was pretty easy to put together and it would be even easier if you made a crumb crust. The pie filling set nicely using just 3 egg yolks and I was able to get a clean slice. I had my slice last night and it was delicious - crisp pastry, soft just set filling topped with lashings of cream. 

See you all again next week with some more baking from my kitchen.

Bye for now,

Jillian 


PRINT RECIPE

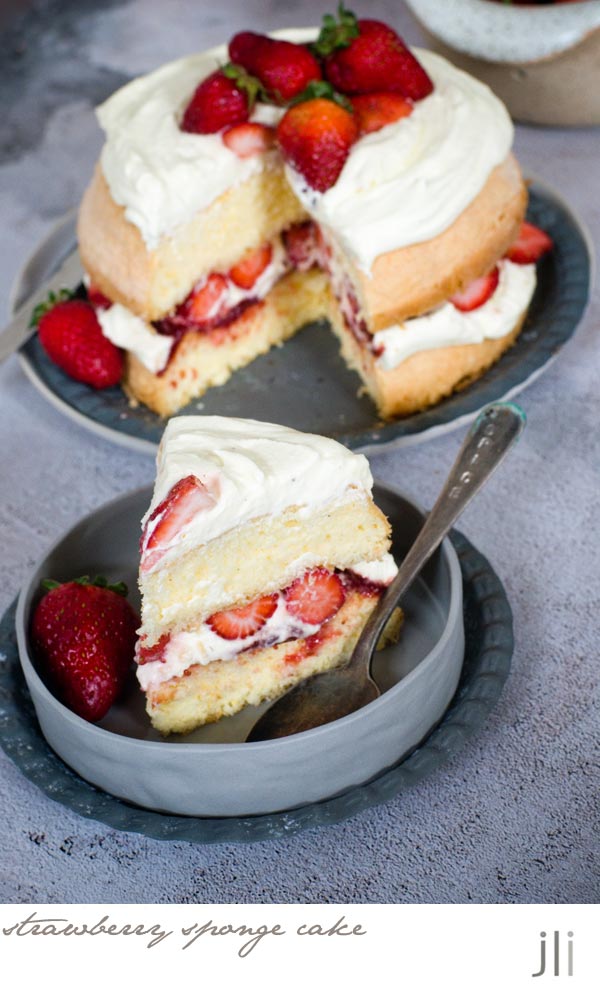
strawberry and cream sponge cake

6 Nov 2022


I have fond memories of taking tea with my grandmother in the tea rooms of a long gone Brisbane Department store. We would always have a slice of sponge cake with our teaeither topped with passionfruit or strawberries.


I saw Pamela Clark, the former food editor of the Women's Weekly, whipping up a passionfruit sponge cake on The Cook-Up a few months ago which immediately took me back to those morning teas with grandma. 


It's not quite peak passionfruit season in Sydney but it is strawberry season, so I decided to make a strawberry and cream filled sponge cake. Please note you need to use wheaten cornflour to make this cake not corn starch, and I found wheaten cornflour at IGA, otherwise plain flour will do.


Here's the recipe for you, which I adapted from here, which makes a 17cm layer cake. For all my recipes I use a 250ml cup and a 20 ml tablespoon, unsalted butter and 60g eggs. My oven is a conventional gas oven so if your oven is fan forced you may need to reduce the oven temperature by 20°C.

Strawberry and cream sponge cake 
Ingredients
2 eggs
pinch salt
85g caster sugar
50g wheaten cornflour
15g custard powder
½ tsp cream of tartar
¼ tsp bicarb soda

Filling
250ml thickened cream
½ tsp vanilla extract or vanilla bean paste
¼ cup (80g) strawberry jam, warmed
250g strawberries, sliced thinly (reserve a few whole berries)

Method
Preheat the oven to 180°C, conventional. Grease, flour and line the base of two deep 17cm-round cake pans with baking paper. Beat eggs, salt and caster sugar in the bowl of a stand mixer for 5 minutes or until thick and creamy. Sift dry ingredients twice onto paper, then over egg mixture; gently fold ingredients together.


Divide mixture evenly between prepared pans; bake uncovered, in a moderate oven for about 20 minutes. Turn sponges immediately onto baking-paper-lined wire rack; turn top-side up to cool.


Beat cream and vanilla in a small bowl with electric mixer until firm peaks form. Place one sponge on serving plate; spread first with jam, then with half the cream mixture. Top with strawberry slices, then with remaining sponge. Top the cake with the remaining cream and decorate the cake with a few whole strawberries.


The cake was as light and fluffy as I remembered but I need to work on my sponge cake technique because both cakes were a bit wonky.


See you all again next week with some more baking from my kitchen. 

Bye for now, 

Jillian
PRINT RECIPE

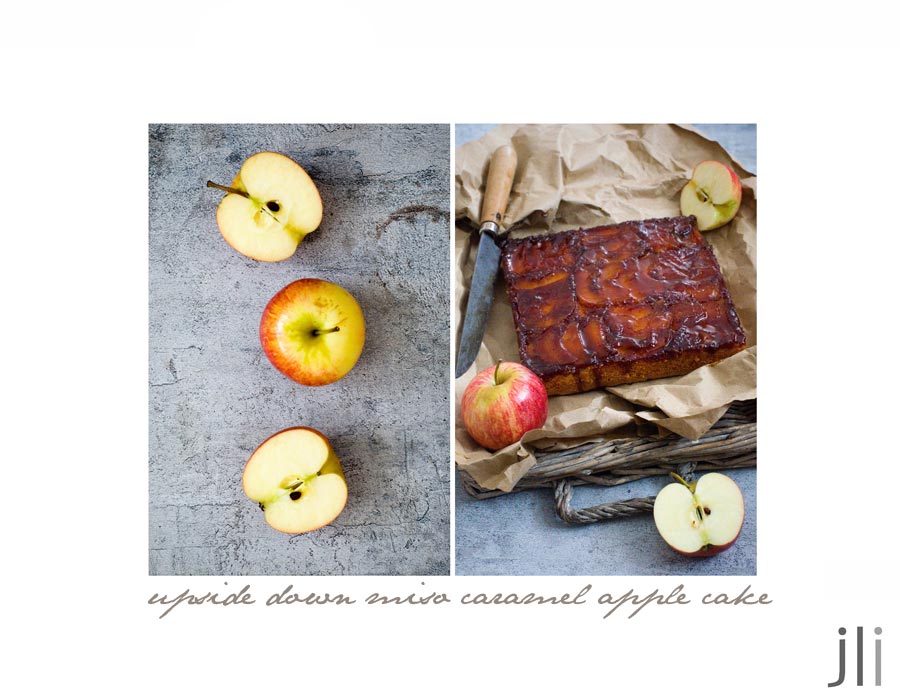
upside down miso caramel apple cake

13 Jun 2022


Do you remember Poh in an episode of Master Chef willing her upside down miso caramel apple cake to cook in time? I've been thinking about that cake ever since and with miso in the fridge and apples in the fruit bowl, the time had come to create my own version.


First I needed to find a miso caramel recipe, which I found here then I topped the apple slices with my standard butter cake recipe using some almond meal as well as flour. Once baked, let the cake cool for 15 minutes or so before inverting, otherwise the still warm cake might crack.
 

Here's the recipe for you which makes a 17cm square or round cake. 
For all my recipes I use a 250ml cup and a 20 ml tablespoon, unsalted butter and 60g eggs. My oven is a conventional gas oven so if your oven is fan forced you may need to reduce the oven temperature by 20°C.


Upside down miso caramel apple cake
Caramel
135g (2/3 cup) caster sugar
1 tbs white miso paste
2 small red apples (250g), cored

Cake
125g (4
½ oz) unsalted butter
110g (½ cup) caster sugar
1 tsp vanilla extract
2 eggs
¾ cup (115g) self-raising flour
½ tsp baking powder
Pinch salt
¼ cup (25g) almond meal

Method
Preheat oven to 180°C, conventional. Grease,
flour and line the base of a deep 17cm x 17cm cake pan with baking paper.

Cut 1 and 1/2 apples crosswise into thin slices, reserving the remaining apple. To make the caramel, place the sugar and 2 tbs (40ml) water in a heavy-based saucepan; stir over low heat, without boiling, until sugar dissolves. Bring to the boil, without stirring. Boil over medium heat, without stirring, for 6 minutes or until light golden-caramel in colour.

Combine the miso paste and 3 tsp water in a small bowl and mix until smooth; stir into the caramel which will spit and bubble so take care. Stir until smooth - you may need to add a little more boiling water at this stage to achieve this. Pour the miso caramel evenly over base of cake pan. Arrange the reserved apple slices in rows on the caramel in the pan. Set to one side.
 
Grate the remaining apple which should yield ¼ cup. Cream the butter, sugar and vanilla together in a bowl until light and fluffy. Add the eggs and mix until combined well. Sift the flour, baking powder and salt together and stir through the almond meal. Add the flour mixture to make a soft batter, then stir through the grated apple. 

Carefully spoon the batter over the apple taking care not to disturb the slices then smooth the surface. Place the cake pan on an oven tray then bake for
35-40 minutes at 180°C, conventional or until a skewer inserted into the centre comes out clean. Cover loosely with foil if cake starts over browning during baking. 


Leave cake in the pan for 15 minutes. Run a butter knife or metal spatula around the cake before turning it out onto a plate, making sure you scrape up all the reserved caramel. You may need to loosen the caramel with a little boiling water then gently brush over the apples. Serve warm or at room temperature with a dollop of cream, labne or creme fraiche.


I shared the cake with my neighbours and the cake received glowing reviews. That miso caramel is something a bit special, that's for sure.

See you all again next week with some more baking from my kitchen. 

Bye for now, 

Jillian

PRINT RECIPE

blood orange and passionfruit cake with passionfruit icing

13 Sept 2021


It's both blood orange and passionfruit season here in Sydney so I decided to use both to make this cake. The original recipe came from from the Australian Women's Weekly Baking Collection cookbook, a copy of which lives on a bookshelf in my kitchen. The cake was made in a loaf tin but I couldn't go past baking it in my favourite bundt tin.


Although I used a blood orange to make the cake, of course you could use a regular orange. I don't like the crunch of passionfruit seeds in my cake so I removed the seeds from the passionfruit pulp by whizzing the pulp in a mini food processor before straining it through a sieve. You discard the seeds but save the juice and 2 large passionfruit made 30 mls of passionfruit juice.
 
 
The cake is a basic butter cake which uses both the orange rind and the pulp in the batter, so you'll need a food processor or blender for this recipe.


Like most cakes, it's all about the icing and here the cake is topped with some passionfruit glace icing.


Here's the recipe for you which makes a small bundt cake. For all my recipes I use a 250 ml cup, a 20 ml tablespoon, unsalted butter and 60 g eggs. My oven is a conventional oven so if you have a fan-forced oven you may need to reduce the temperature by 20°C.
 
Blood orange and passionfruit bundt cake with passionfruit icing  inspired by an Australian Women's Weekly recipe
Ingredients 
150g blood oranges 
30mls passionfruit pulp or juice 
110g unsalted butter, softened 
½ cup (110g) caster sugar 
1 egg 
1 cup self-raising flour (150g) 
¼ cup plain flour (37.5g)
pinch salt
¼ cup (60ml) milk 
 
Passionfruit icing 
¾ cup (120g) sifted icing sugar 
10g butter, melted 
1 tbs passionfruit pulp 
1 tbs blood orange juice 
 
Method 
Preheat oven to 180°C, conventional. Grease and flour a small bundt tin then place in the fridge until required. 
 
Using a vegetable peeler, remove the rind from the oranges and reserve. Using a small sharp knife, remove white pith from the oranges, discarding the pith. Quarter the orange and discard seeds. Blend or process orange flesh and rind until pulpy - you should have at least ½ cup (125mls) of orange pulp. Stir in the passionfruit pulp. 
 
In a large bowl, cream the butter and sugar until light and fluffy. Add the egg and mix on low speed until incorporated. Add the sifted flour in thirds, alternating with the milk and orange mixture and mix until combined. Spread the mixture into the prepared pan. Bake cake for about 45 minutes or until a skewer inserted in the cake comes out clean. 
 
Stand in the pan for 10 minutes then turn out onto a wire rack to cool. 


Icing 
Stir ingredients in a medium bowl until mixture is smooth and of a drizzling consistency. Drizzle the icing over the cooled cake and allow to set before serving. 


I do love a butter cake and this one is no exception. The cake is lovely and let's face it the passionfruit icing just makes the cake a little bit special. 
 
See you all again next week with some more baking from my kitchen.
 
Bye for now,
 
Jillian 
PRINT RECIPE

apple and custard teacake

6 May 2019


Sometimes its good to revisit old favourites. I've been making this cake for a very long time and decided to make it for friends last weekend. The cake is a nice old fashioned butter cake topped with cinnamon spiced apples and has a surprise inside, a layer of thick vanilla custard.


Even though its an age since I last made it, I remembered the cake batter being quite thick which made it a stretch to cover a 9 inch cake. Instead I decided to make the cake in an 8 inch tin and added 1/2 cup of buttermilk to the cake mixture. 


When I looked online the recipe I found was a little different from the recipe in my old cookbook, and that recipe also added 1/2 cup buttermilk. Great minds think alike.


Here's the recipe for you which makes an 8 inch cake. For all my recipes I use a 250 ml cup, a 20 ml tablespoon, unsalted butter and 60g eggs. My oven is a conventional gas oven so if your oven is fan forced you may need to reduce the oven temperature by 20°C. 


Apple and custard teacake 
Custard
2 tbs custard powder
1/4 cup (55g) caster sugar
1 cup (250ml) milk
20 g butter
2 teaspoon vanilla essence

Cake
200 g unsalted butter, plus 20g extra, melted
110g (½ cup) caster sugar
½ tsp vanilla
2 eggs
1¼ cup (185g) self-raising flour
¼ cup custard powder
Pinch salt
½ cup (125ml) buttermilk
2 (400g) apples, peeled, thinly sliced
1 tsp caster sugar
¼ tsp ground cinnamon

Method
To make the custard, combine custard powder and sugar in a small saucepan; gradually stir in the milk. Stir over heat until the mixture boils and thickens. Remove from heat; stir in the butter and essence. Press plastic wrap over surface; cool.

Preheat the oven to 180°C. Grease a deep 20cm round cake pan; line with baking paper.

Beat butter, sugar and vanilla in a medium bowl with an electric mixer until light and fluffy. Add eggs, one at a time, beating until combined between each addition. Stir in the sifted flour, custard powder and salt and buttermilk, in two batches.

Whisk the cooled custard until smooth. Spread half of the cake mixture into the prepared pan; top with custard.  Dollop small spoonfuls of the mixture over the top of the custard then gently spread the remaining cake mixture over custard until completely covered. Overlap apple slices on top; brush with the extra melted butter, then sprinkle with combined caster sugar and cinnamon.

Bake for about 1 hour or until firm; stand 5 minutes before turning onto a wire rack to cool. This recipe can be made up to a day ahead.


The cake went down a treat with people coming back for seconds.

I'm about to drop my keys to the housesitter as  tomorrow I'm flying to Europe. First stop Geneva to attend a conference followed by a holiday in Greece and a few days in Helsinki on my way home. Pictures to follow. 

Bye for now,

Jillian 

PRINT RECIPE

pink finger buns

22 May 2017

Growing up, a finger bun slathered with butter and topped with icing (and the icing had to be pink) was one of my favourite treats. Sure you could get ones with plain icing (boring) and ones topped with coconut, which I thought was and still think is an abomination. 


When I was last home in Brisbane I went through my old recipe file and returned to Sydney with this finger bun recipe that I'd cut out from the Australian Women's Weekly. It's yellowed and faded and must be at least 30 years old.


I haven't had a finger bun in ages so I pulled out the recipe and stuck it to the fridge with a fridge magnet and went to work. I changed the recipe ever so slightly by adding some dried apricots and soaking the fruit first in hot tea. I just used an English Breakfast tea bag but I'm sure any other flavour would do just as well.


I shouldn't cook when tired so there were a few disasters along the way. I forgot to grease the tin so the cooked buns stuck a bit to the tray. 


Once I glazed the buns, I managed to rip the tops off half the buns while trying to get them out of the tin. Memo to self - don't bake when tired. I also ran short of icing but couldn't be bothered making any more.


Am I the only one that makes silly decisions when over tired? Thankfully I still had 4 left that were suitable to photograph and the pink icing covered a multitude of sins in the remaining buns.


I already had some natural pink food colouring in the cupboard so used a few drops to tint the icing. The finger buns looked exactly as I remembered so once they were photographed, I slathered one with butter and enjoyed it with a cup of tea. 


It tasted pretty good but honestly the finger bun would be nothing without that pink icing. If you'd like to make a batch at home here's the recipe for you which will make 8 buns. For all my recipes I use a 250 ml cup and a 20 ml tablespoon. All eggs are 60 grams and my oven is a conventional oven not fan forced, so you may need to reduce your oven temperature by 20°C. If you need to feed a crowd then just double everything. 

Pink Finger Buns – makes 8

Ingredients
¼ cup sultanas
2 tbs each dried currants and coarsely chopped dried apricots
1 tea bag
½ cup boiling water
2 tsp (7 g) dry yeast
25g caster sugar
2/3 cup warm milk
2 cups (300g) plain flour
30 g (1 ounce) butter, chopped
1 egg, beaten lightly

Glaze
2 tsp caster sugar
½ tsp powdered gelatine
2 tsp hot water

Icing
1 cup icing sugar
2 tsp butter, melted
1 tbl milk, approximately
Pink food colouring

Method
In a small bowl combine the dried fruits, add the tea bag and cover with boiling water. Leave to one side to steep for at least an hour. Drain well before using.

Grease a 20 cm x 30 cm (8-inch x 12-inch) lamington pan. Combine yeast, sugar and milk in small bowl. Cover; stand in warm place about 10 minutes or until frothy. Sift flour into large bowl, rub in butter. Stir in yeast mixture, the beaten egg and the well-drained fruit and mix to a soft dough. Cover; stand in warm place about 45 minutes or until doubled in size.

Preheat oven to 220°C/425°F. Knead dough on floured surface about 5 minutes or until smooth and elastic. Divide dough into 8 portions; shape into buns 15 cm (6-inches) long. Place eight buns into the pan; cover loosely with lightly oiled plastic wrap, stand in a warm place until buns are well risen. Bake buns 8 minutes; cover loosely with foil, bake a further 5 minutes or until golden brown.

For glaze, combine ingredients in small pan; stir over heat, without boiling, until sugar and gelatine have dissolved. Turn buns, top-side up, onto wire rack; brush with hot glaze, cool.

For icing, sift icing sugar into small heatproof bowl, stir in butter and enough milk to make a firm paste; tint pink with colouring. Stir over hot water until spreadable. Spread icing over top of cold buns.


My junior taste testers gave the buns the seal of approval as did the adults. I can't wait to make them again.


See you all again next week with some more baking.

Bye for now,

Jillian
PRINT RECIPE

chocolate peanut brittle cake

29 Aug 2016

I saw a photo of this popcorn and peanut butter cake in an old copy of the Australian Women's Weekly and thought I'd like to give it a try. The cake was topped with peanut butter icing and some crunchy nut popcorn. 


I couldn't find any crunchy nut popcorn in the store so I swapped it for some home made peanut brittle adapted from this recipe. I found a very yummy looking peanut butter icing online so decided to use that to top the cake.


I reduced the original recipe a little and baked it in my 17cm tin. The cake rose like crazy so I think it I should have used a slightly larger tin, perhaps a 7-8 inch tin or maybe a rectangular slice tin. As you can see, the peanut butter icing covered a multitude of sins.


If you're allergic to peanuts I'm sure it would be fine to swap the peanut butter for another nut butter and use popcorn or a different nut brittle to top the cake.


Here's the recipe for you. For all my recipes, I use a 250 ml cup and a 20 ml tablespoon. All eggs are 60 grams and my oven is a conventional gas oven, so if your oven is fan forced, you may need to reduce your oven temperature by 20°C.


Chocolate Peanut Brittle Cake

Cake Ingredients
⅓ cup dutch process cocoa powder
⅓ cup boiling water
125g butter, softened, chopped
1 cup caster sugar
1½ tsp vanilla extract
2 eggs
1 cup self-raising flour
½ cup plain flour
¼ cup buttermilk

Peanut Butter Icing
80g unsalted butter, room temperature
¼ cup smooth peanut butter
1 cup sifted icing sugar
¼ cup cream
Pinch of salt

To Serve
Peanut brittle, crumbled
2 tsp icing sugar

Instructions
Preheat oven to 170°C (150°C fan-forced). Grease, flour and line the base of an 7-8 inch round tin with baking paper.

Combine sifted cocoa and boiling water in a large bowl and mix until smooth. Add butter, sugar and vanilla; beat with an electric mixer until batter is smooth. Beat in eggs, one at a time. Add sifted flours and buttermilk, in two batches; beat on low speed until just combined. Spread mixture into pan.

Bake cake for 55 minutes to 1 hour or until a skewer inserted into the centre comes out clean. Leave cake in pan for 5 minutes before turning, top-side up, onto a wire rack to cool.

To make the icing, cream together the peanut butter and butter until pale. Add the icing sugar, scrape the sides of the bowl and mix until combined. Pour in the cream and beat until smooth then mix in the salt. Beat on high for a few minutes or until the buttercream has become light and fluffy.

Place the cake on a serving plate; spread the icing on top and store in the fridge until serving time. Just before serving, arrange the crumbled peanut brittle on the icing, then dust with sifted icing sugar. 


I'm new to this whole chocolate peanut combination so wasn't sure if I'd like the finished product.


So what did I think? The peanut butter icing was absolutely delicious but because I'd used such a little tin, the icing to cake proportions were a bit out of whack. 
The icing made a very generous amount - enough to cover the top and fill the cake as well so if you made the cake in a larger tin there would be plenty of icing without any adjustments. 

Next time I think I'd either make it in a slice tin slathered with the peanut butter icing or I'd make an 8 inch layer cake. That peanut butter icing was just too good to waste.

See you all again soon.

Bye for now,

Jillian
PRINT RECIPE
© DELICIOUS BITES • Theme by Maira G.